
Explore the Island Settings Panel
The Island Settings Panel – situated to the right of your project map – is where you upload your media, set your choices, place your buttons and more.
Below we have detailed the Island Settings Panel, showing you what each of the buttons/sections on the setting panel is used for.
Click on the links (or scroll down) to see full information about each of these settings.
NB this page is currently undergoing updates – in the meantime, explore the settings panel details below and visit our other help pages to find out about some of the game-changing features not mentioned below:
Upload your own image files as buttons 💡
Use our advanced game logic for even more scoring and variables 🕹
Learn about our Adobe integrations👨💻
Did you know that you can now use 8 buttons? (available on pro subscriptions and above)
Island Settings
Island Settings:
1. All
2. Script
3. Sequence or Location
4. Variant/Tab 1
4a. Adding a new tab
5. Variant/Tab 1 Name
6. Variant/Tab 1 Description
7. Start Island
8. Show this on screen
9. Play from here
10. Public URL
11. Upload media
Onscreen Choices
Onscreen Choices:
12. Choice 1
12.a Adding a choice
13. Order of choices
14. Add choice
15. Links to
16. Set as default
17. Cut on click
18. Hide choice
19. Custom button text
20. Button images
*hidden – Button Memory
21. Show hide buttons
22. Game settings
23. Either/Or settings
24. Custom Button Properties
Onscreen Choice Styling
Onscreen Choice Styling:
25. Displaying onscreen choices
26. Button location style
27. Custom edit button positions
28. Button colors
29. Onscreen question
30. Hide question
31. Invisible hotspots
32. Timer
Media
Media:
33. Video
34. Image
35. Voyager
36. Add Video/Image
37. Adobe Express integration
38. Choose an existing file
39. What to do when the video ends
40. 360 Video projection
41. Subtitles/Captions
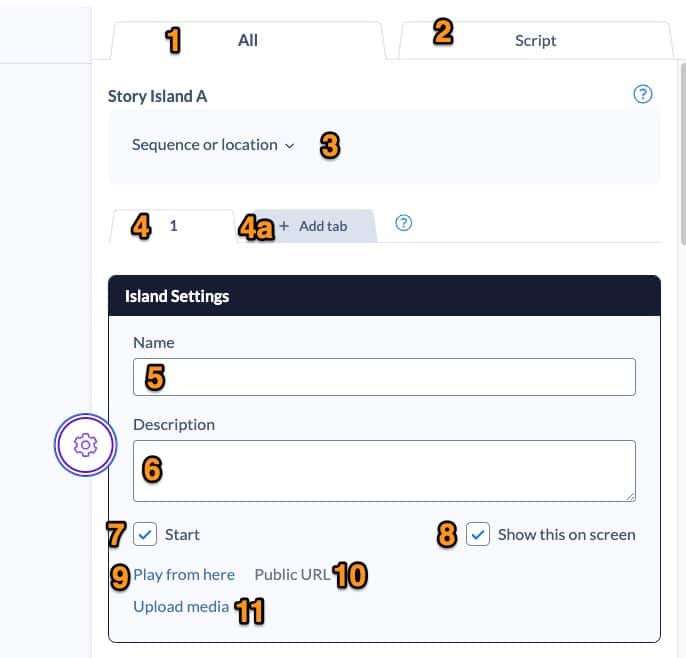
Island Settings
Manage general settings for your story islands – set names and descriptions, add tabbed versions of scenes and get drafting with interactive scriptwriting.
1 - All
In this tab, you will find all the settings for your overall island – control links, buttons and media in here!
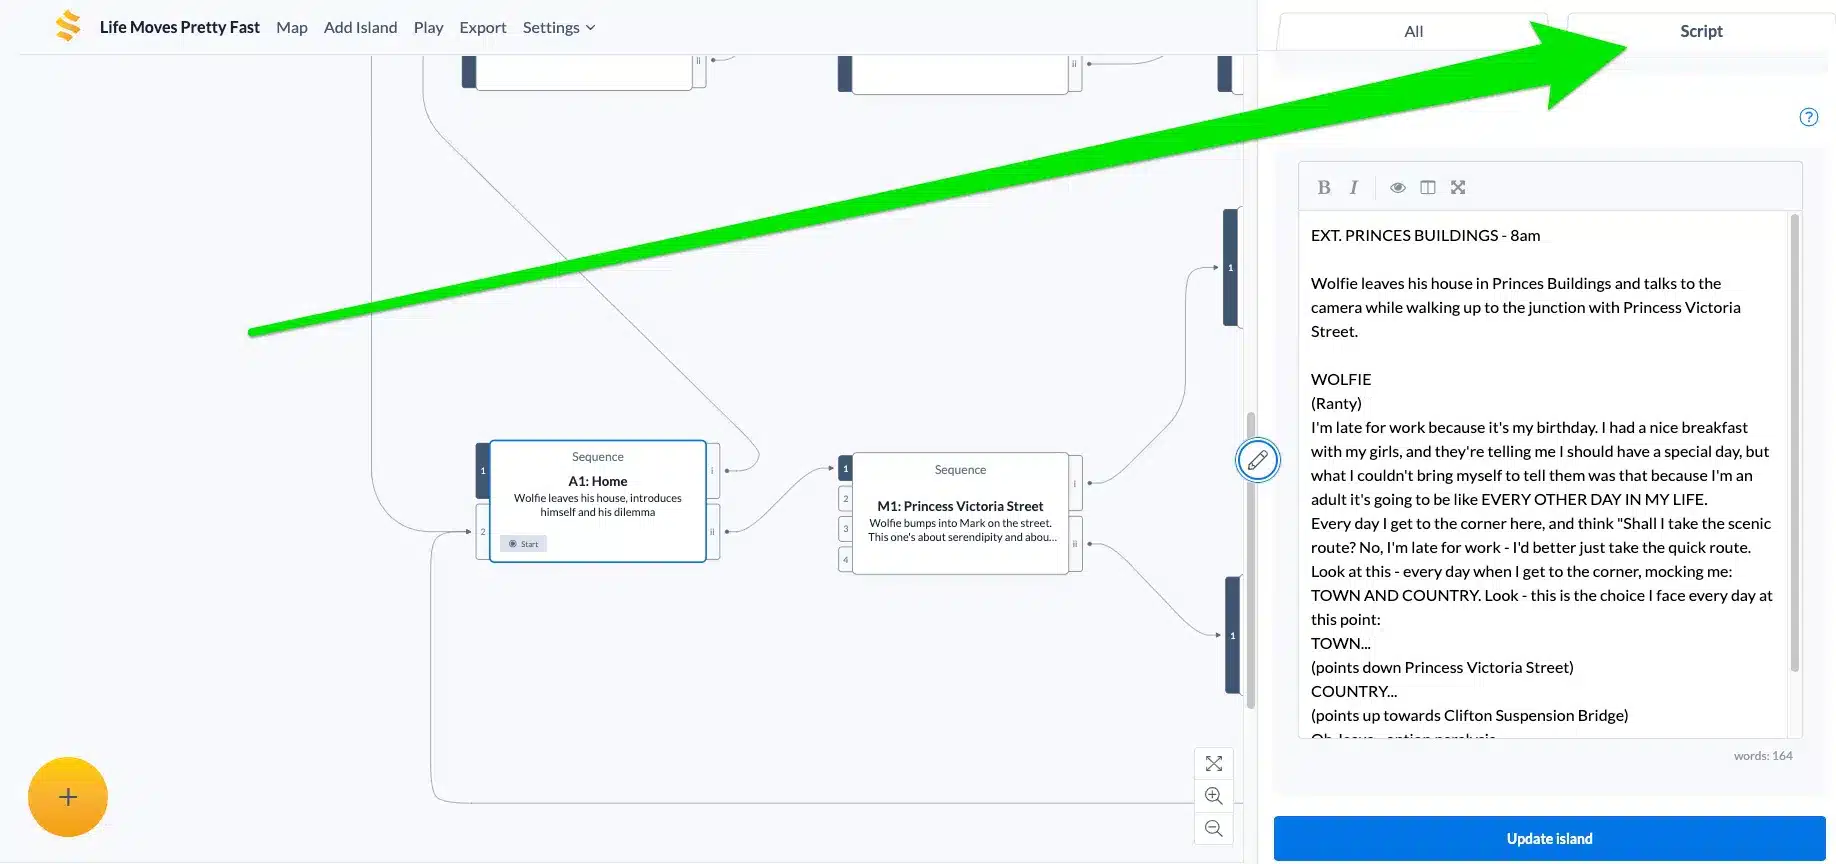
2 - Script tab
This Script tab allows you to write non-linear script pages connected to each Story Island, which you can read interactively by following links between Islands. The ability to export and import interactive scripts is on our roadmap and will be coming in the near future.
You can read more about Interactive Script Writing here.
3 - Sequence or location
If you have more than 1 tab in your story island, you can use the Sequence / Location field to give your island a general title.
4 - Variant/Tab 1
Our patented tabbed story islands let you keep your map tidy by neatly stacking different variations of an island with different content for different pathways.
For example, if you have two scenes in your journey that have the same media, but you want different buttons and links on them depending on what a viewer has previously chosen, tabs are perfect for this.
Each tabbed version will contain their own set of settings, so you can tailor the media, buttons, links and everything else between them.
4a - Adding a new tab
Add a new tab by clicking “+ Add Tab” . You can create up to 8 tabbed variations of an island to keep your story map neat and concise.
5 - Variant/Tab 1 Name
Here, you can set your name for the tabbed variation to keep it uniquely identifiable from the others and it will update on you story map once saved.
You can also change this directly on your story map by double-clicking on the ‘Name’, entering text and hitting Enter.
6 - Variant/Tab 1 Description
Here, you can set your description for the tabbed variation to give it more context. It will update on you story map once saved.
You can also change this directly on your story map by double-clicking on the ‘Description’, entering text and hitting Enter.
7 - Start Island
All Stornaway projects require a Start Island – this is so the player knows where to begin. You can choose where your want your interactive video to start by going into the relevant island, selecting this checkbox and saving your island.
If you try to validate your project with multiple start islands, the validation process will fail until your update your story map to have only one selected.
8 - Show this on screen
If you have this checkbox ticked, the player will display any text you have entered in the ‘Name’ or ‘Description’ fields.
This is extremely useful for testing out journeys before you have media available, so you can play through your interactive video with descriptions of what the viewer will eventually see once content is uploaded.
Once videos are uploaded to your island, this checkbox is automatically unticked.

9 - Play from here
This powerful link allows you to preview your interactive video from any point in the journey! If you’re looking to test out a specific pathway, or simply want to view how the current island looks without having to play through the whole journey, all you need to do is go into an island and click ‘Play from here‘.
10 - Public URL
When you have published your story, there’s a Public URL for every island. This is a link to that specific island, so you can provide links that let viewers jump straight to an island.
This lets you share an individual island on social media, or make a list of links on a web page or create a playable visual map of your story (see our example here).
11 - Upload media
A handy time-saving action that links directly to the media section of your island settings panel.
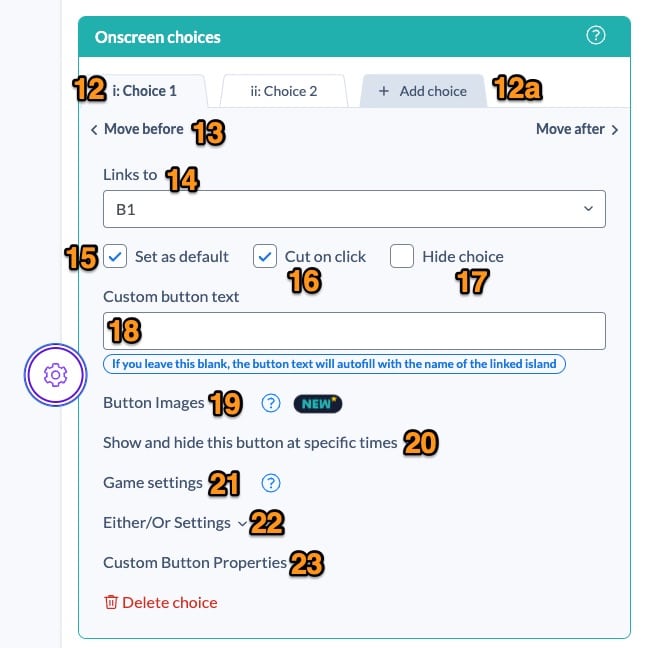
Onscreen Choices
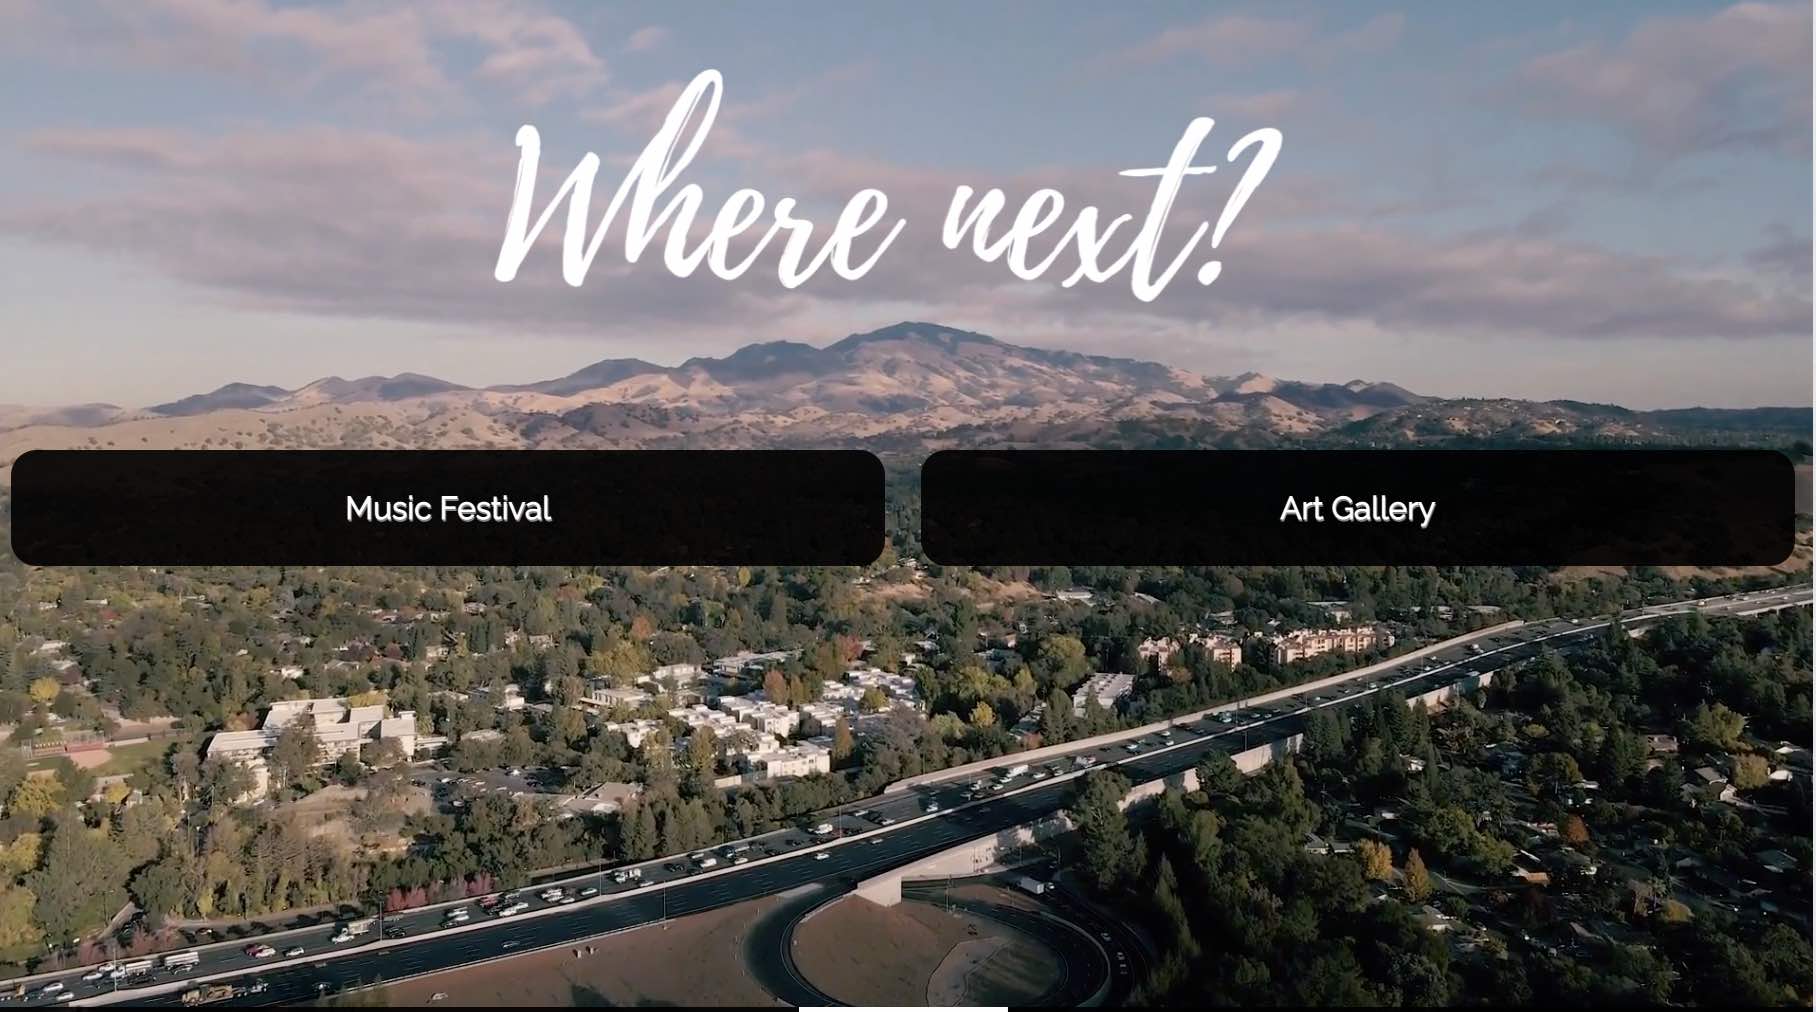
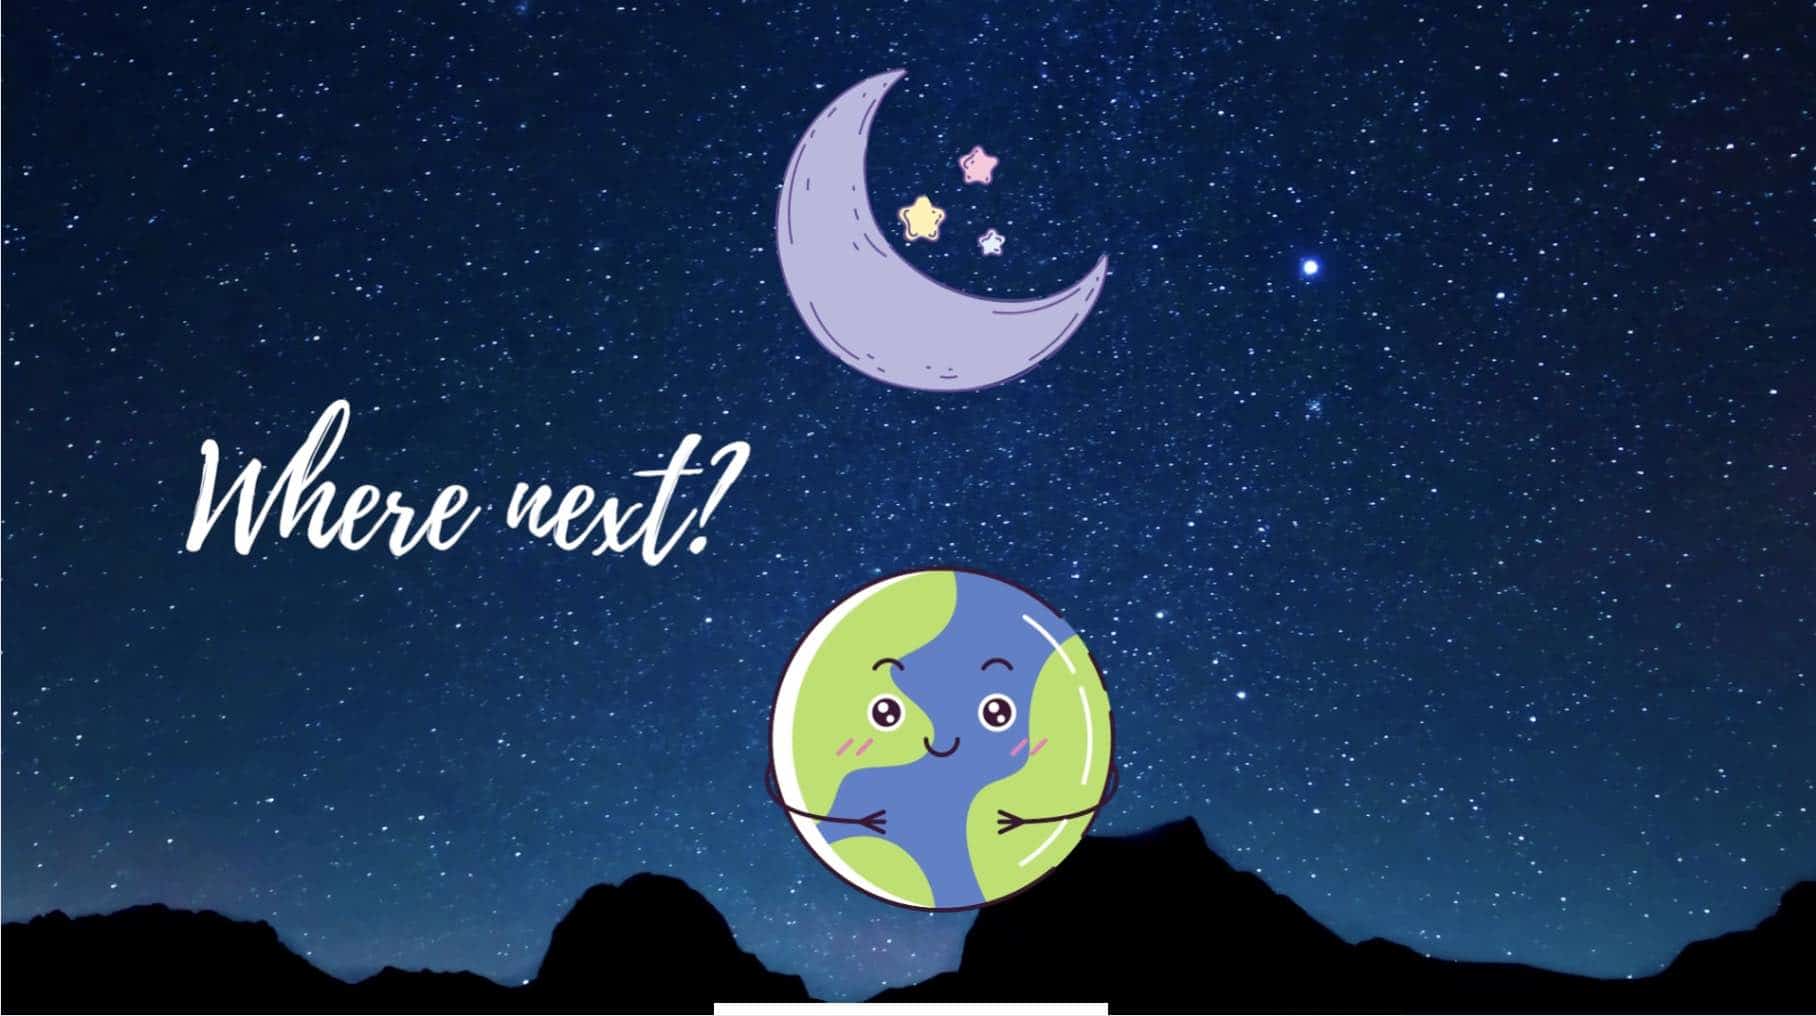
Control your buttons and choices for a fully customised interactive video. Upload button images, set up scoring and gaming mechanics, and decide where choices will link to.
12 - Choice 1
These numbered tabs refer to the choices (or buttons) that will be shown on your island. By default, new islands that are created will begin with 2 choices already made, but you have the option to add up to 8! If you require more, this option is available on our Custom Plans (get in touch to learn more).
13 - Order of choices
If you want to swap the order of your choices, you can click the “< Move Before” and “Move After >” links to shift them around.
14 - Add choice
Add a new choice by clicking “+ Add Choice” . You can create up to 8 choices for each island tab.
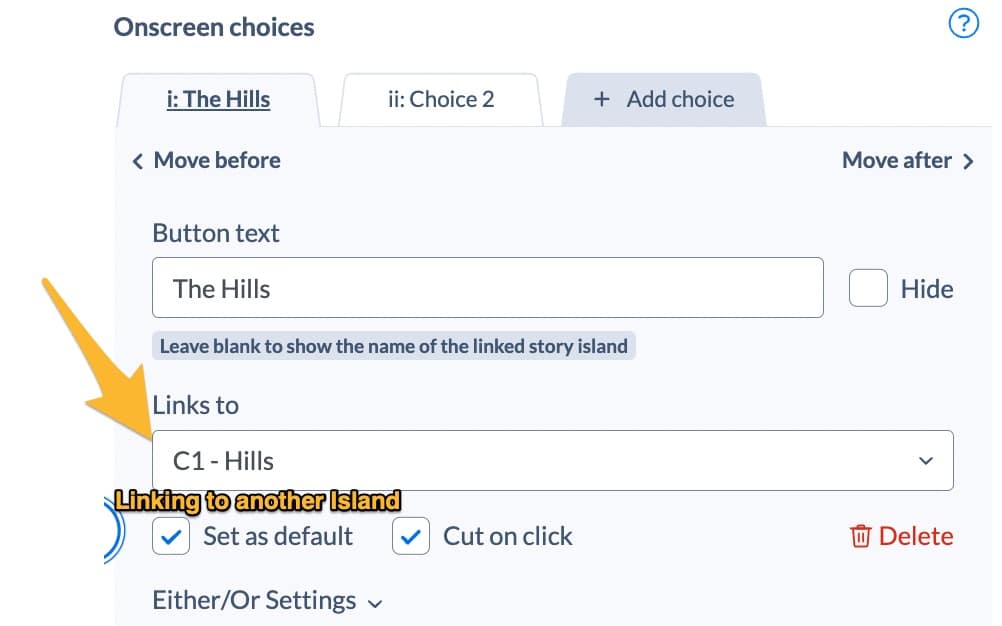
15 - Links to
In this dropdown, you can choose where the viewer will go once this choice is selected. Usually, this will be another island on the story map:
But you can also set the choice to link to an External URL. This will send the viewer to a URL, like another webpage, form or anywhere else on the web. You can set that to open in a new tab, the same tab your video is being played on, or you can set it to display within the player frame by using the ‘within iframe’ option.
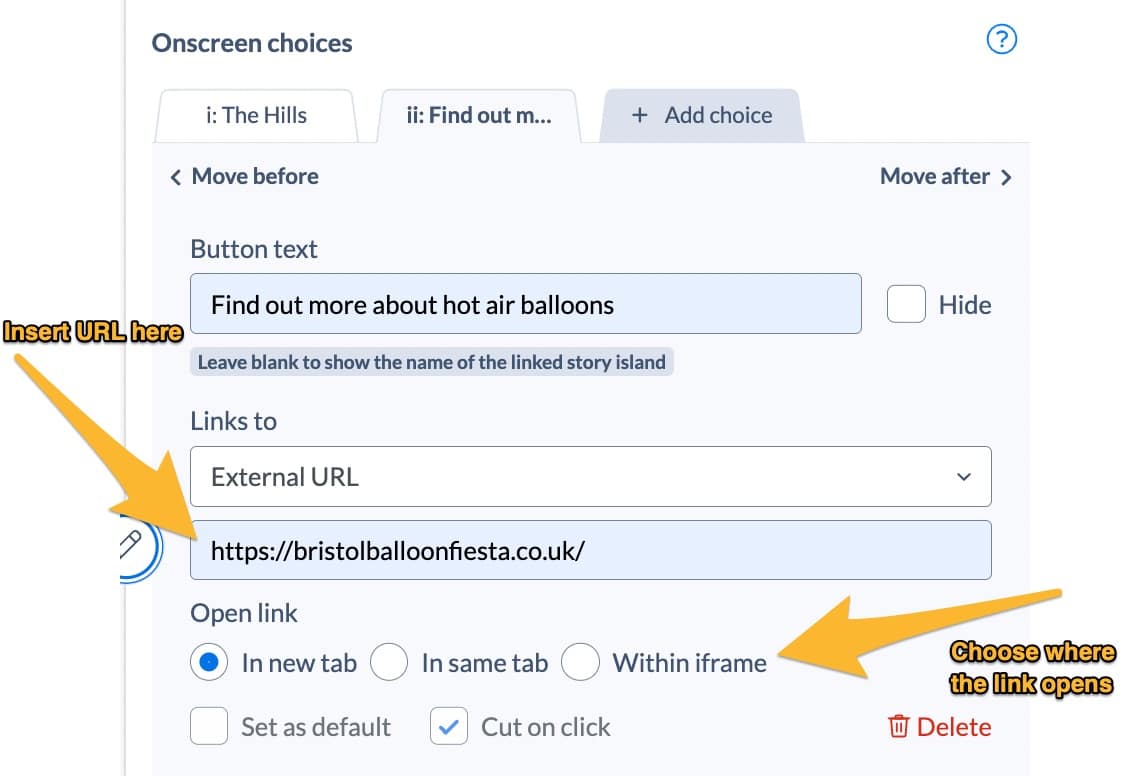
To learn more about our External URL feature, watch our tutorial video here.
16 - Set as default
If the user doesn’t make a choice before the video ends, the player will move on to play the default choice as the next video.
There can only be one default choice per island, and it must be set – your project won’t validate for publishing if there’s no default set.
If you want to ensure that the viewer does pick the next island – ensure Pause at end is selected (full details below). This will stop the island at the end to wait for the user to make a decision, overriding the default choice behaviour described above.
17 - Cut on click
This is ticked by default for all choices in new projects.
It means that when the viewer clicks a button, it will immediately switch to play the chosen island.
The opposite of this is ‘progress mode‘. This means that when the viewer clicks a button, it will wait for the end of the video before switching to play the chosen island. This is useful for seamless playback and good for drama. To use this, untick the ‘cut on click’ checkbox.
18 - Hide choice
This checkbox lets you hide the button on your video and cannot be selected by your viewers.
This is particularly useful with a default path – if the user doesn’t click any buttons, they will be taken to the default hidden choice that is separate from the visible choices displayed to the viewer. This can be used for invisible edits, looping videos and more.
19 - Custom button text
By default, this will be blank. If empty, when playing back your video, the choice will automatically be pre-filled with the name of the linked island.
You can override this by entering your own text in the ‘Custom button text’ field which will be displayed in the button for your viewers.
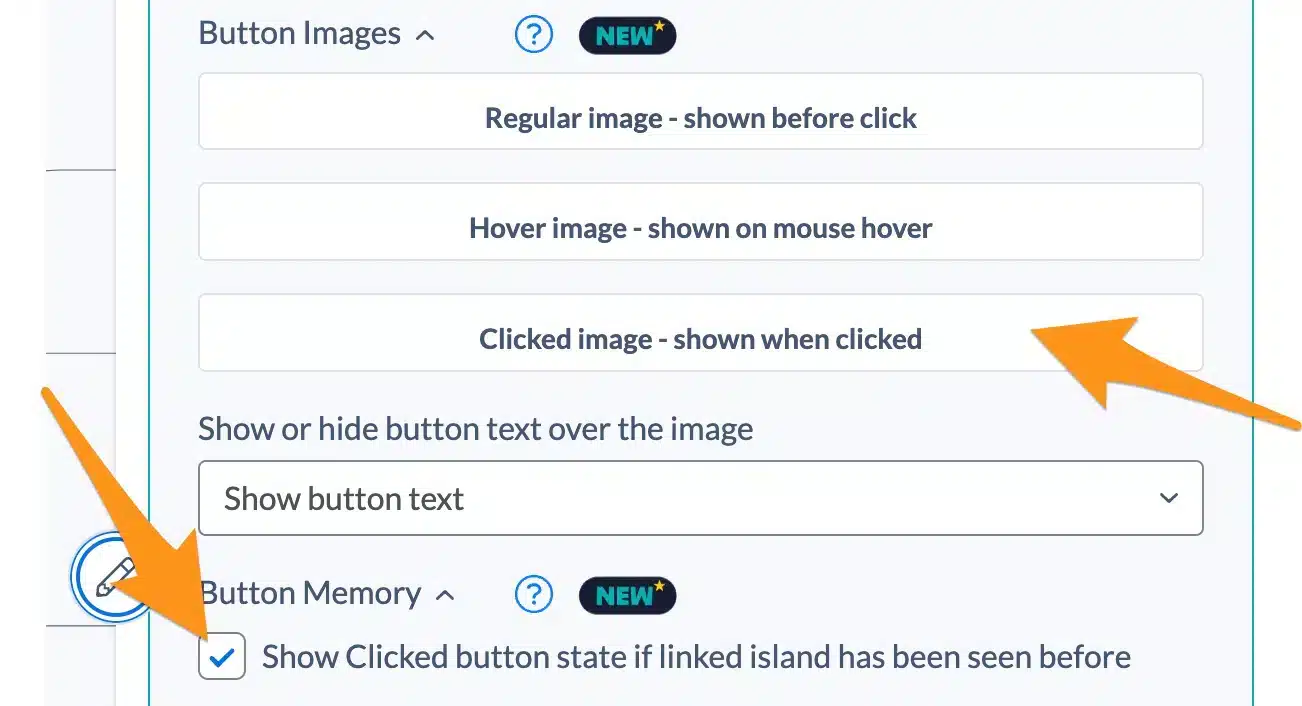
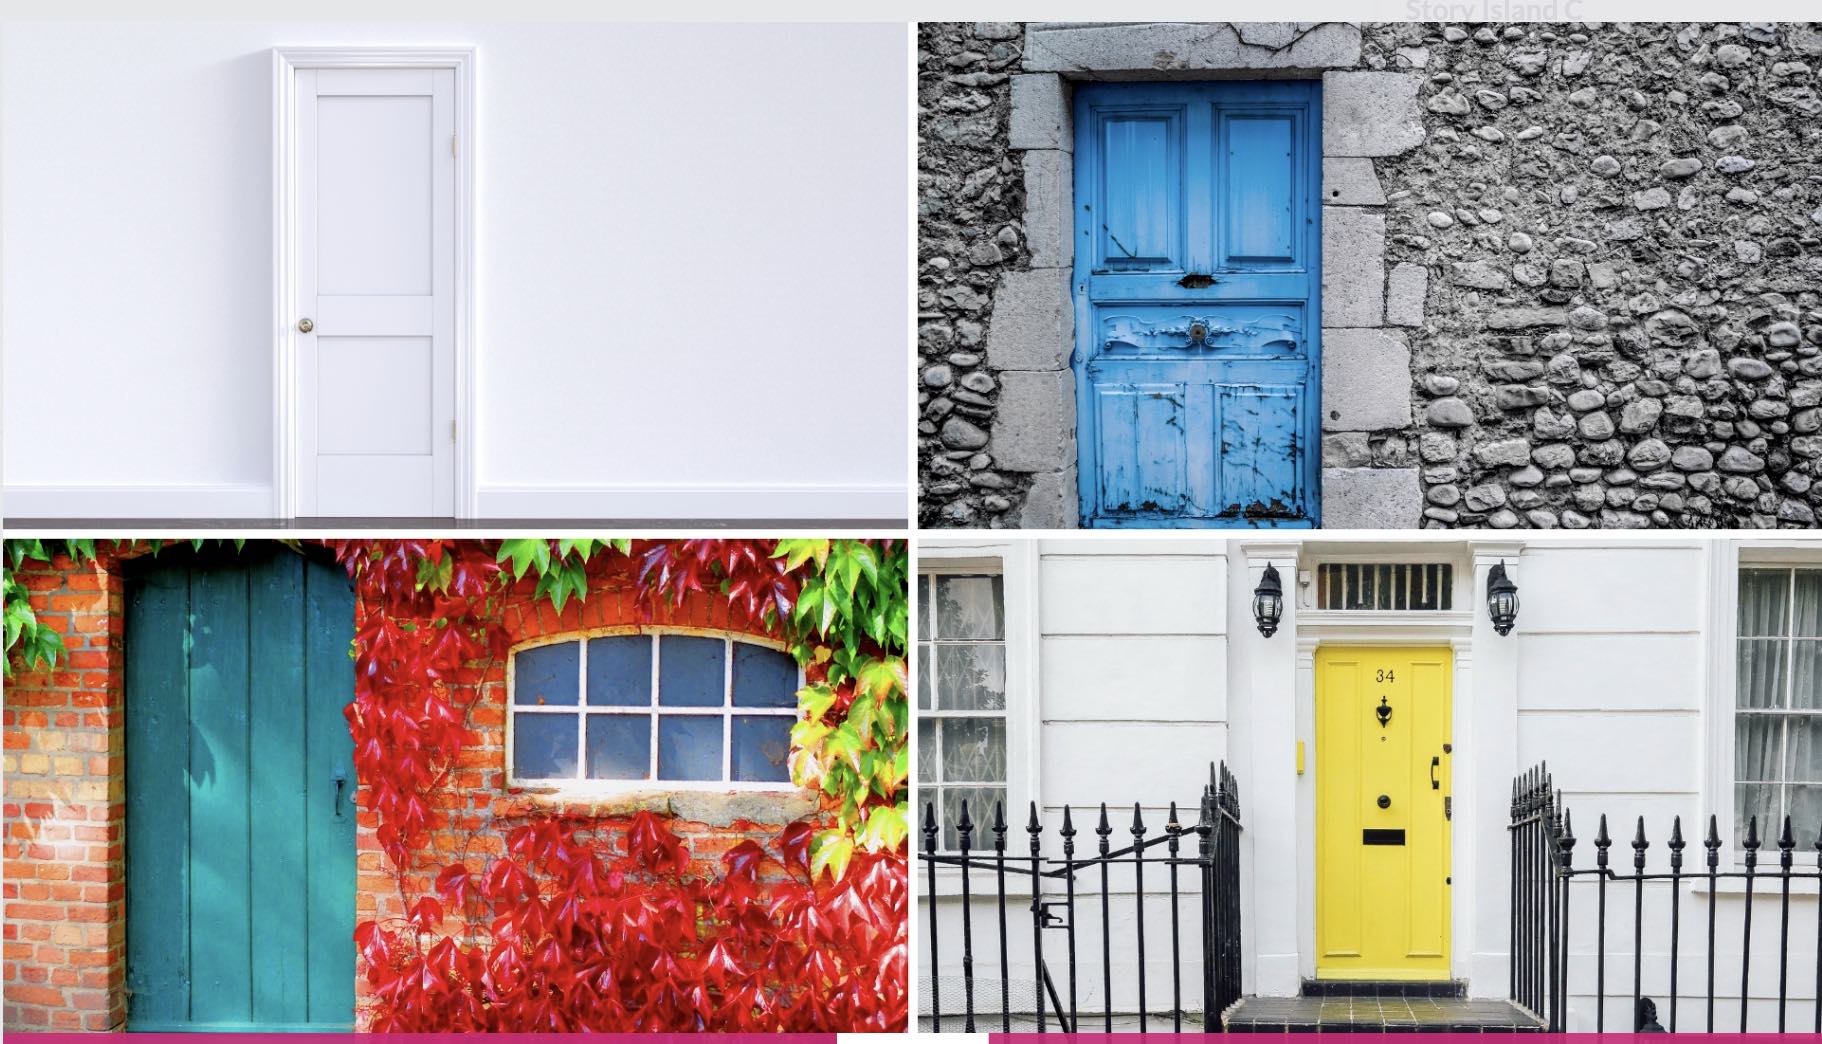
20 - Button images
Click the ‘Button Images‘ title to open this section and you’ll be able to upload images which will replace the Stornaway default button styles with your file.
You can use pretty much anything you want. We support the 3 main types of web image files: png, jpg and gif.
There are 3 optional states that you can upload images for:
- Regular image: this is shown immediately when the choice is visible, before viewers interact with the choice.
- Hover image: this is displayed when a viewer hovers over the choice (note: this will not be visible on touchscreen devices).
- Clicked image: this is shown when a viewer selects this choice. You could use it as a reward for picking the “right” option or as an opportunity to give a little fun-fact before the next video shows.
To read more about this feature, visit our help page on button images.
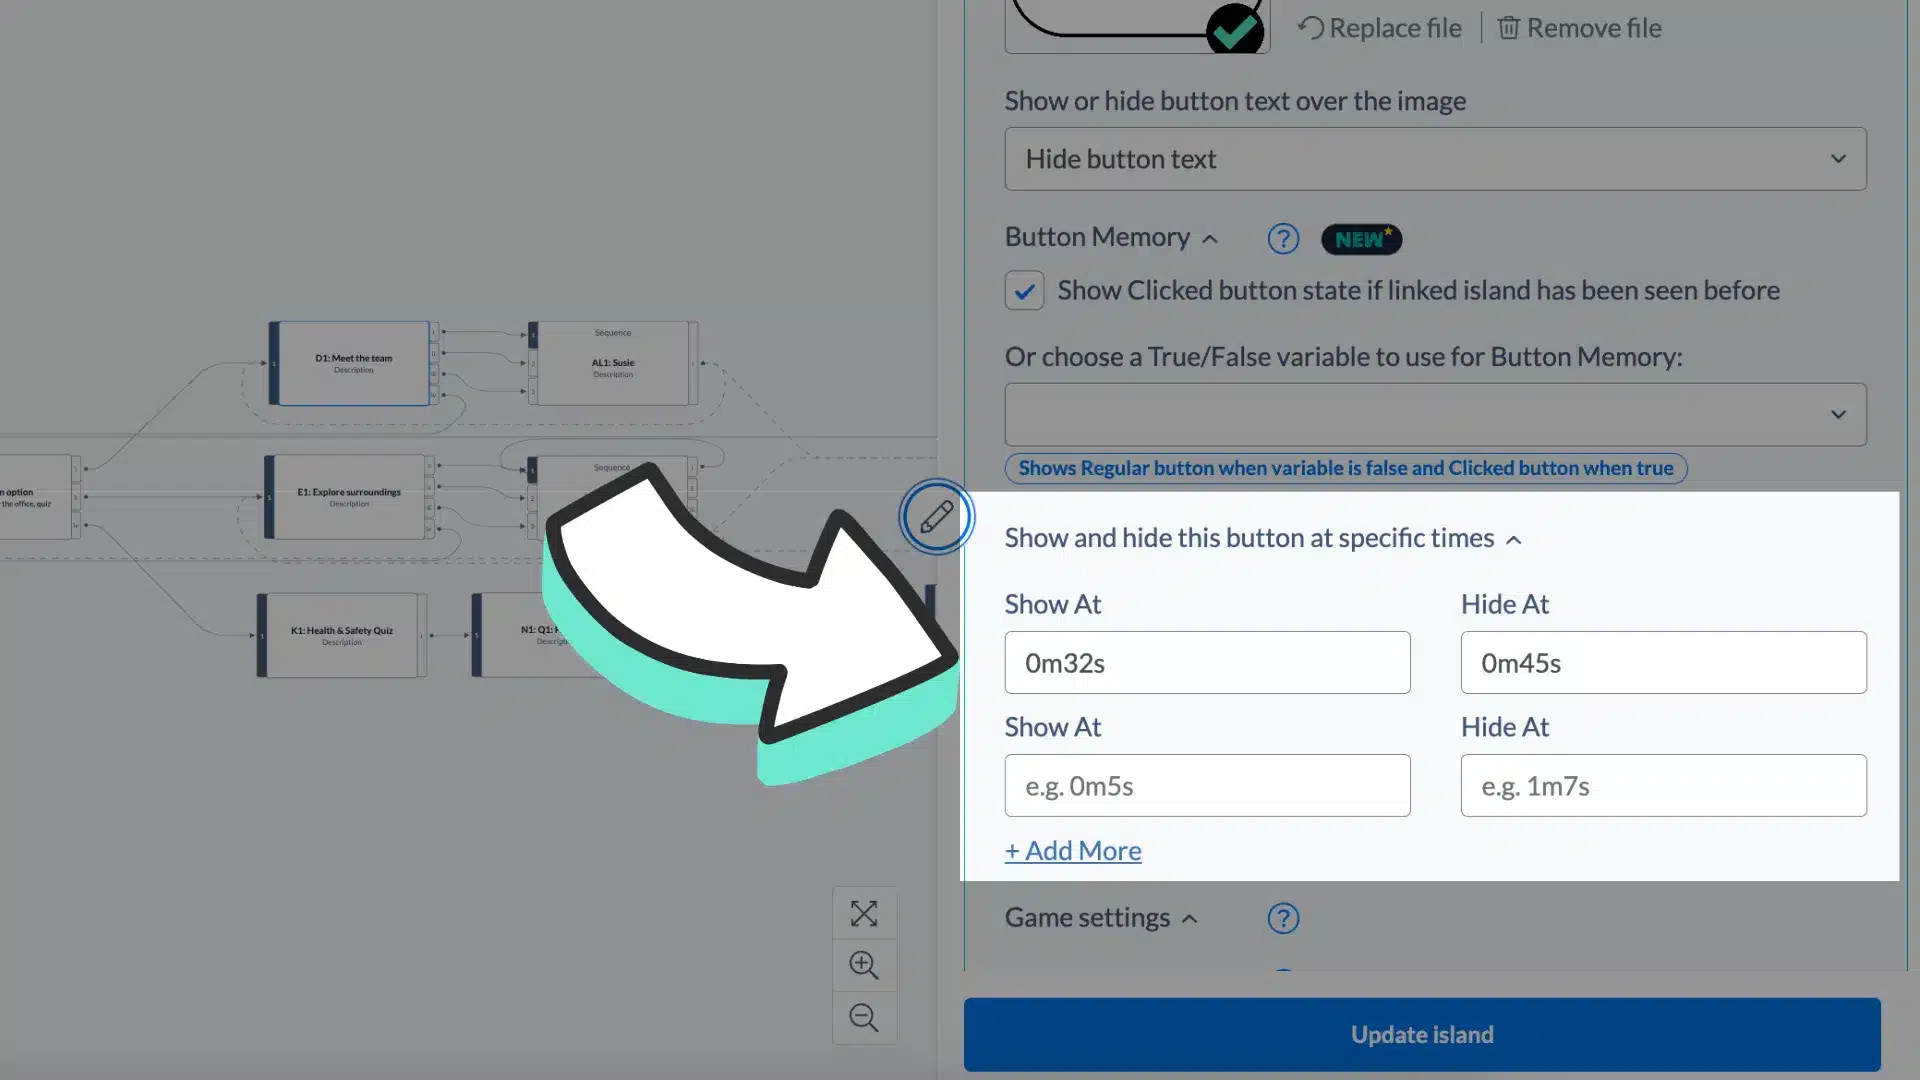
*hidden option – Button Memory
Within the button images section, you’ll find a secret superpower; button memory! Use this checkbox to show viewers what they’ve seen before.
Useful for menu or chapter items, it will display the ‘clicked’ image (if uploaded) or selected state (when using our default button styles) if the linked island has previously been visited.
Discover more on our Button Memory help page.
21 - Show / hide buttons
If you have a longer length video and want to show your buttons at certain times throughout, our show/hide button feature is perfect.
In each choice, you’ll have the option to enter a ‘show time‘ and ‘hide time‘ where you choices will be displayed and then hidden accordingly. You can choose to show/hide your buttons as many times as you like by adding more timings so it can appear at multiple points within your video.
22 - Game settings
This game-changing mechanic allows you to add more advanced settings to your choices. Whether it’s keeping track of scores, adjusting character relationships or managing inventories, our new game settings features gives you the power to store, change and check the value of these variables across your project.
Watch our tutorial video and read our more in-depth walkthrough on our Game Settings help page.
23 - Either/Or settings
Our Either/Or Logic is a way of checking back on what the user has chosen before, enabling the video to route the viewer accordingly.
You can set link options as a result of what someone has done/seen earlier.
For example, you can set Button 1 so that if the viewer clicks it, they will be taken to a reward if they made a good decision earlier, or to a punishment if they had made a bad decision earlier.
24 - Custom Button Properties
This section is used to control your button sizing. To enable this, you’ll need to select ‘Custom Button Positions’ on the ‘Style’ dropdown (found under the ‘Onscreen Choice Styling’ section – more on this below).
Once that’s done, you’ll be able to set a height and width for your buttons! Whether you’re using our Stornaway default button style, or have uploaded your own button images, this control works for all styles.
The percentages for each height/width field are taken from the player screen size. This means that whatever screen your viewer is watching on, the size and positions of the buttons remain relative.
Best of all, these controls can be made on a choice-by-choice basis, meaning you can create different sizes for each button to really customise your interactive project.
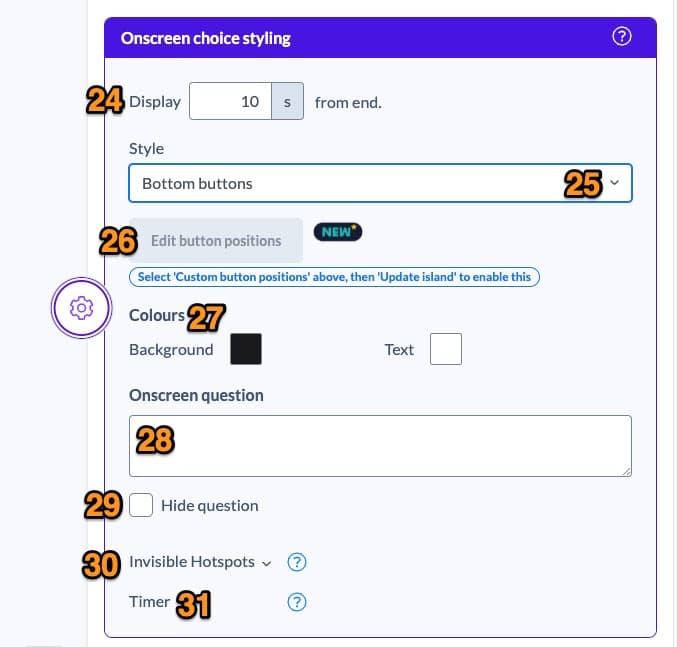
Onscreen Choice Styling
Adjust overall styles for your choices – set up timings, change colors and positions, and enable invisible hotspots.
25 - Displaying onscreen choices
This sets how many seconds the buttons should appear before the end of the video. The default for this is 10 seconds, however you can amend to whatever works for your project.
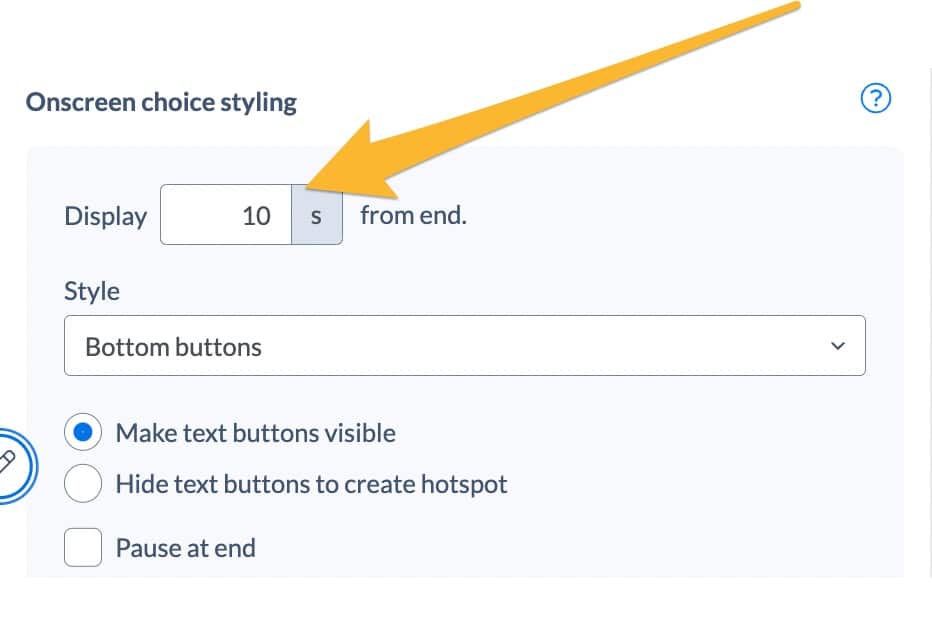
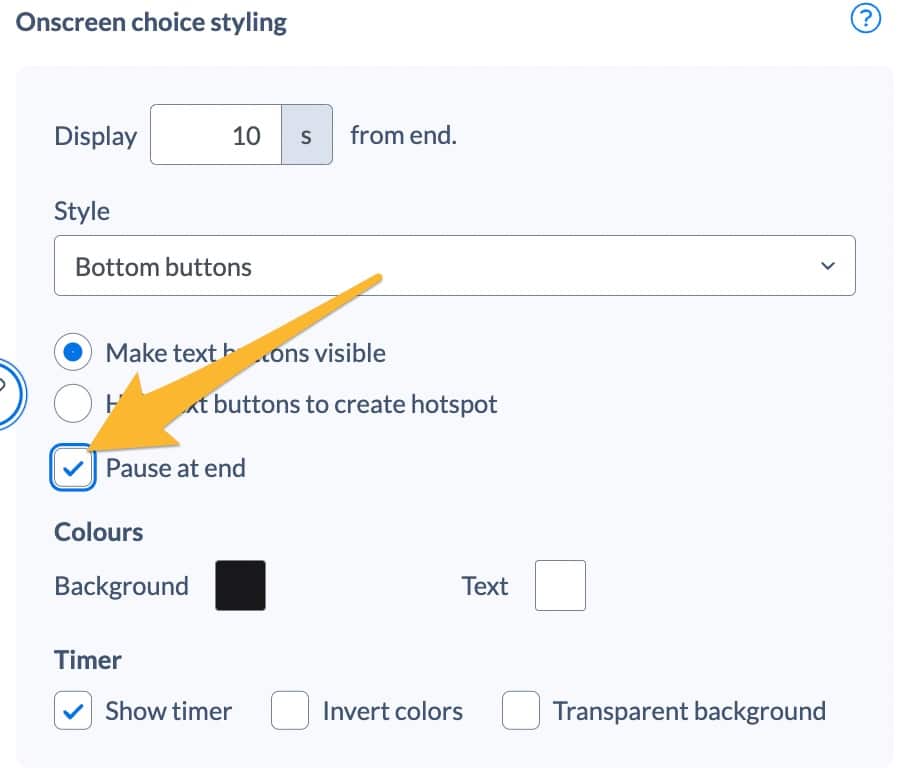
If you need longer than the video length for the viewer to make a decision, use the Pause at end – below – option too.
26 - Button style
There are currently 6 default button styles. With all our default styles, however many buttons there are, they are divided equally across the full width of the screen.
The different options are:
- Bottom Buttons
- Bottom Banner
- Right Hand Text
- Split Screen (Left – Right)
- Split Screen (top – Bottom)
- Quadrant Split Screen
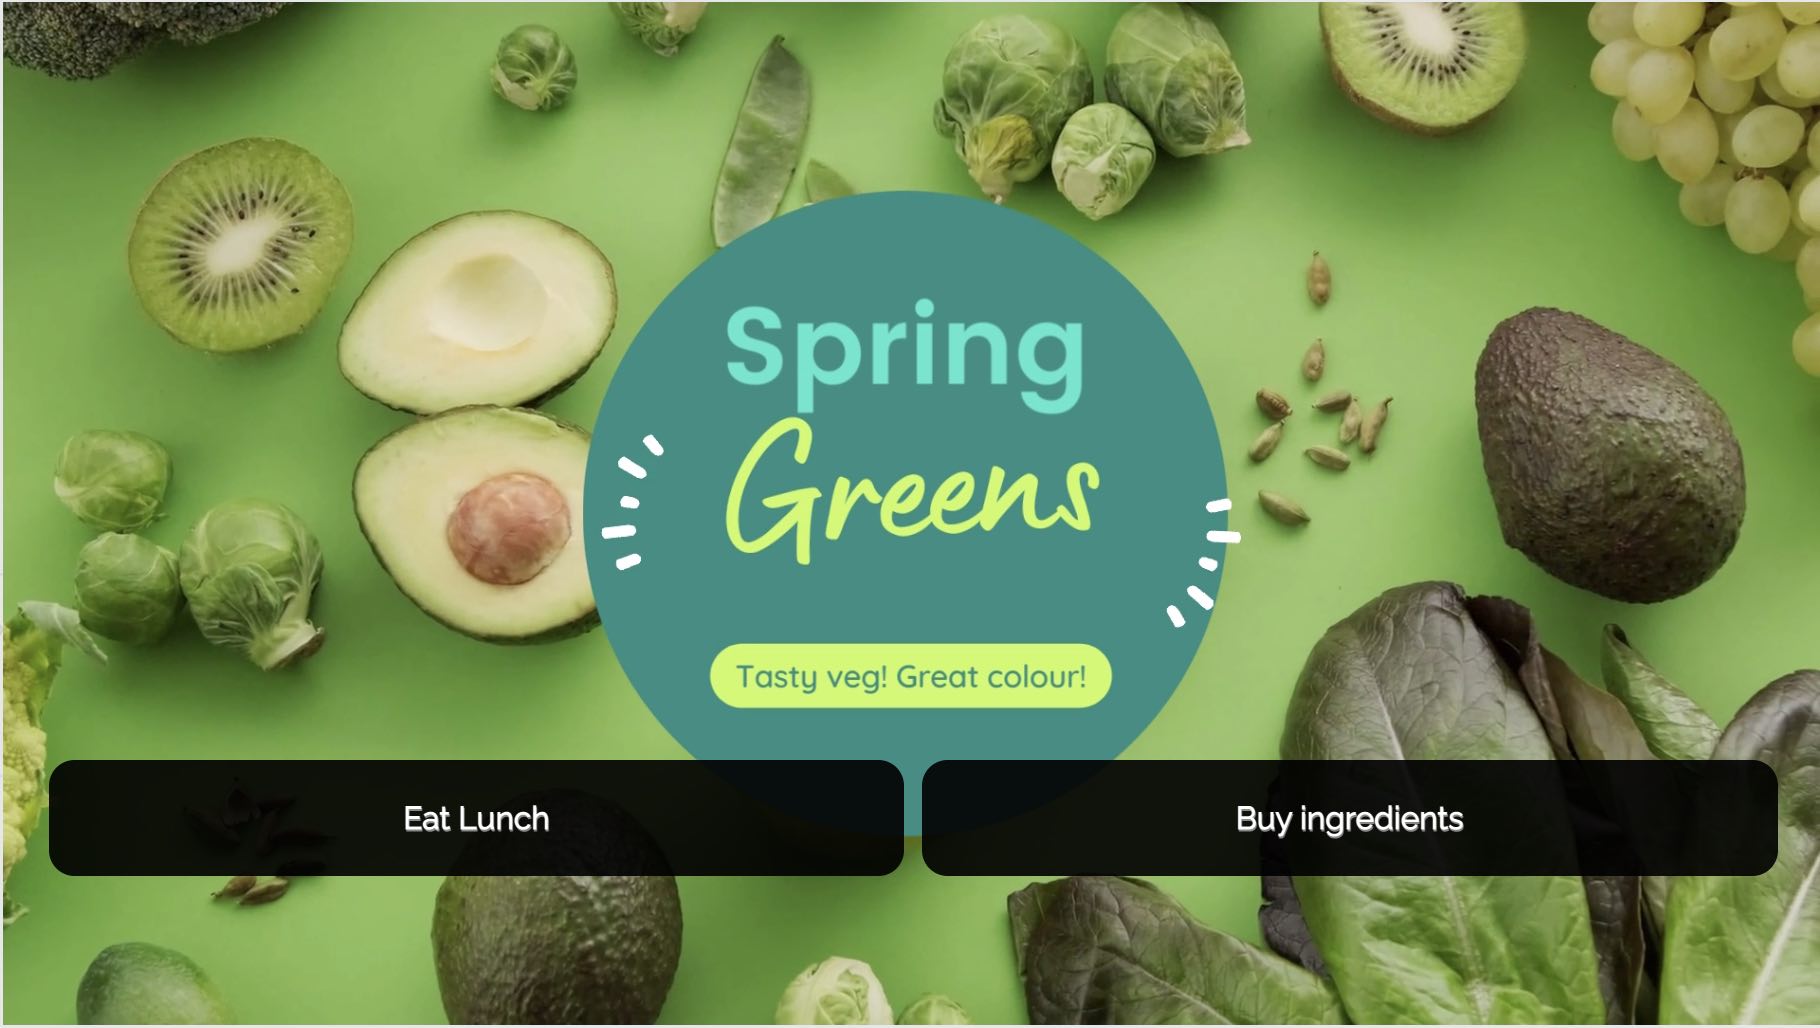
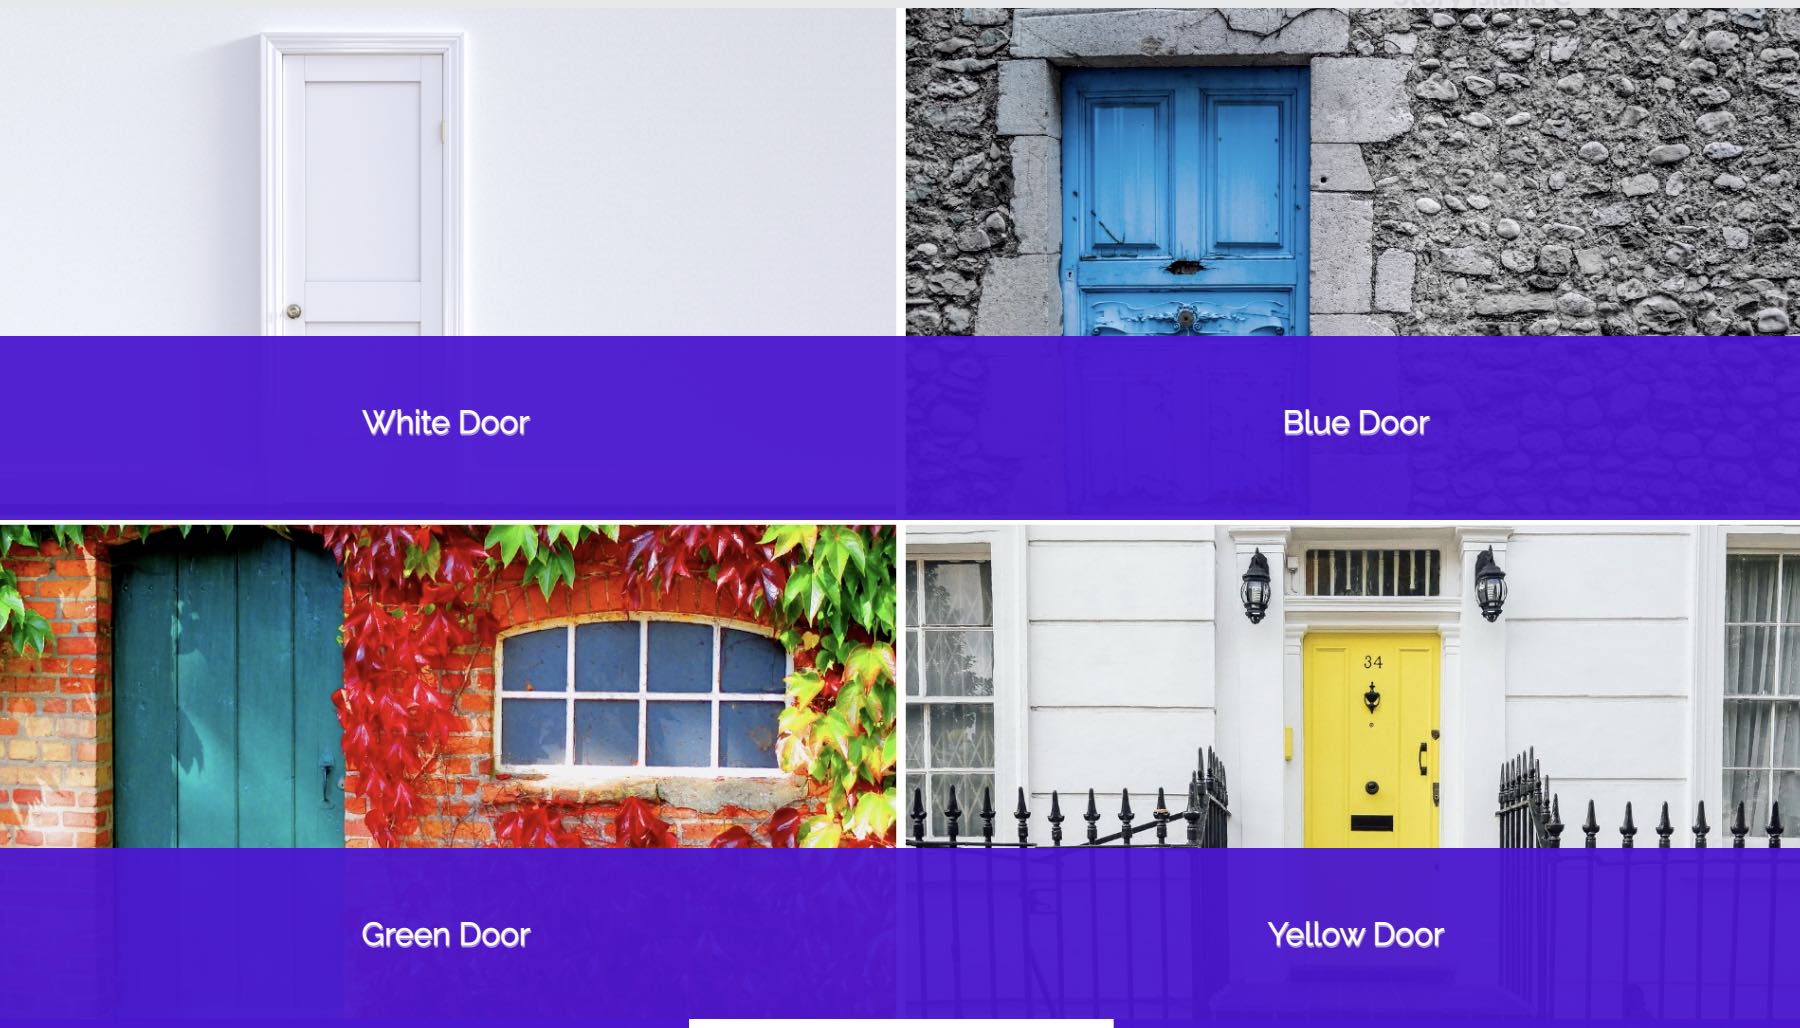
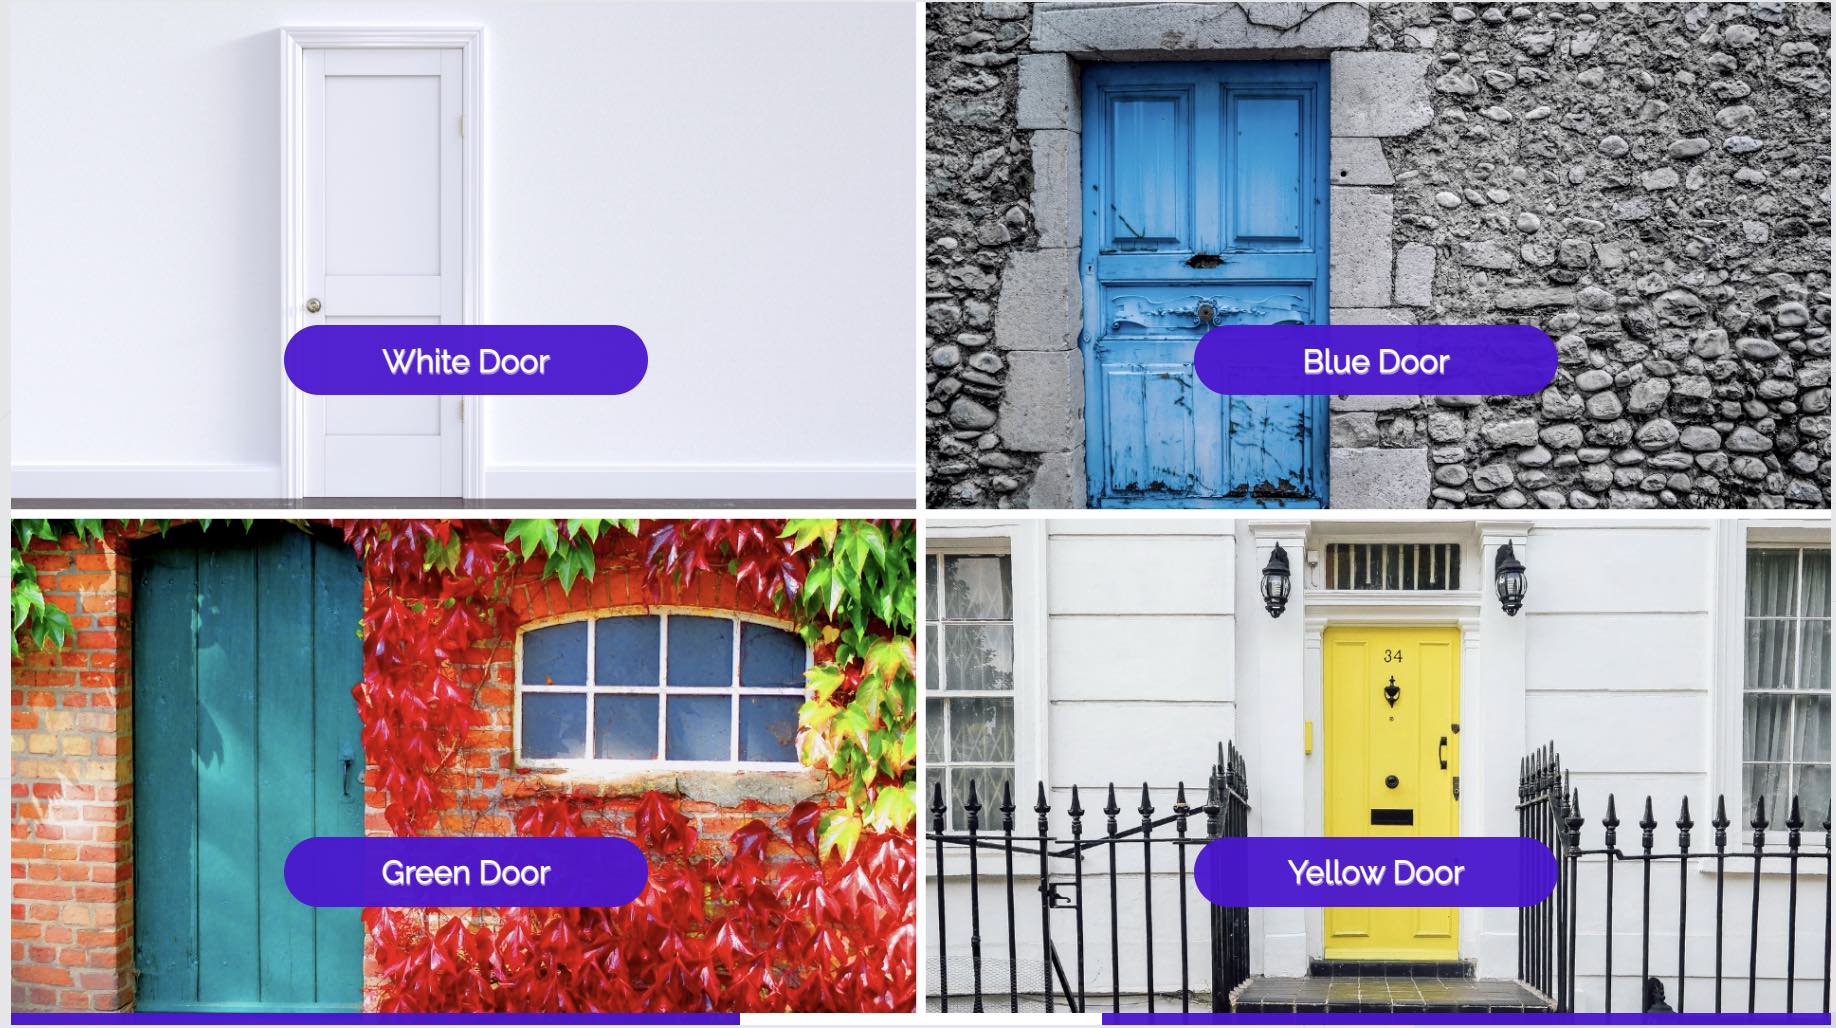
Bottom Buttons
Our default button style is bottom buttons. These are rectangles with rounded corners.
Bottom Banner
This is the style that was used by Netflix in Bandersnatch.
Right Hand Text
Useful if you want to sit the decision making to the side of the main video action.
Left-Right Split Screen
This is mostly used in conjunction with the “Hide text buttons to create hotspot” option, for creating invisible clickable hotspot areas on the screen. We often see this over the top of split screen graphics in the video.
When visible as text buttons, there are 2 possible substyles –
Central text & area overlay – which overlays the whole area with the text in the middle (this is the default area used for hotspots).
Central button – this option creates central buttons – the same as the bottom buttons style above – but aligned vertically.
Top-bottom split screen
The screen is split as above, but from top-to-bottom.
Again, this is mostly used in conjunction with the “Hide text buttons to create hotspot” option, for creating invisible clickable hotspot areas on the screen. We often see this over the top of split screen graphics in the video.
Central text & area overlay – which overlays the whole area with the text in the middle (this is the default area used for hotspots).
Central button – this option creates central buttons – the same as the bottom buttons style above – but aligned vertically.

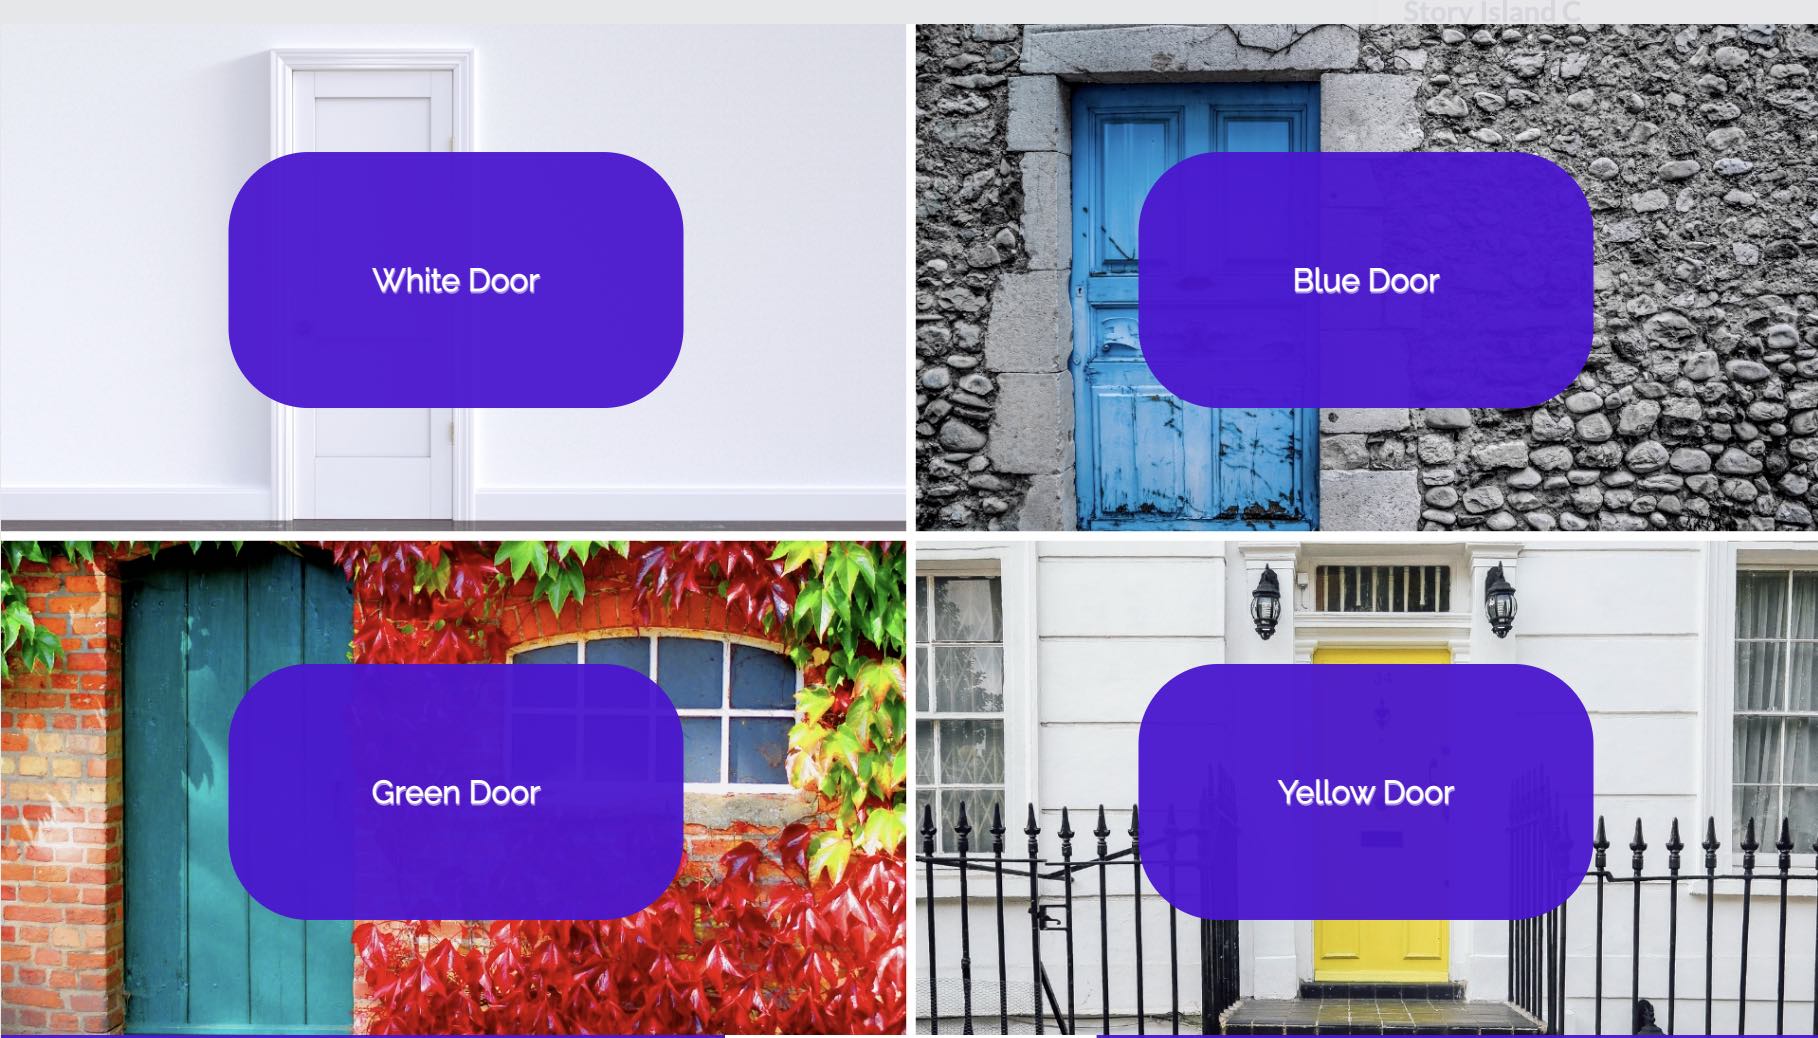
Quadrant split screen
With this option, the screen split into 4 quadrants.
This is mostly used in conjunction with the “Hide text buttons to create hotspot” option, for creating invisible clickable hotspot areas on the screen. We often see this over the top of split screen graphics in the video.
There are 4 text substyle options – Central text & area overlay which overlays the whole area with the text in the middle (this is the default area used for hotspots), or a central text button, or bottom banner or bottom button.
Quadrant split screen – Central text & area overlay
Quadrant split screen – bottom banner
Quadrant split screen – central text button
Quadrant split screen – bottom button
27 - Custom edit button positions
If you have selected ‘Custom Button Positions’ on the style dropdown, once your island is saved, this button will become active. Clicking it will open our button position editor, so you can move the buttons to wherever you want to on your screen.
Simply drag and drop your buttons to any place within the editor, close the window, and your button positions will automatically be saved.
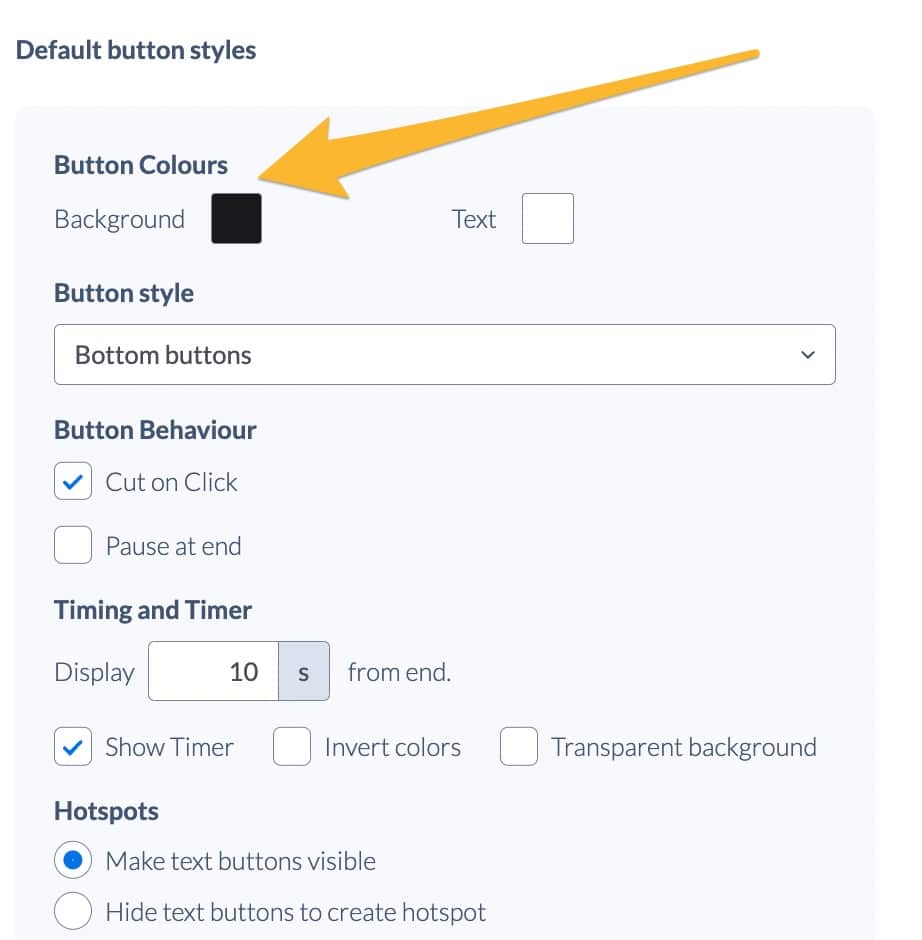
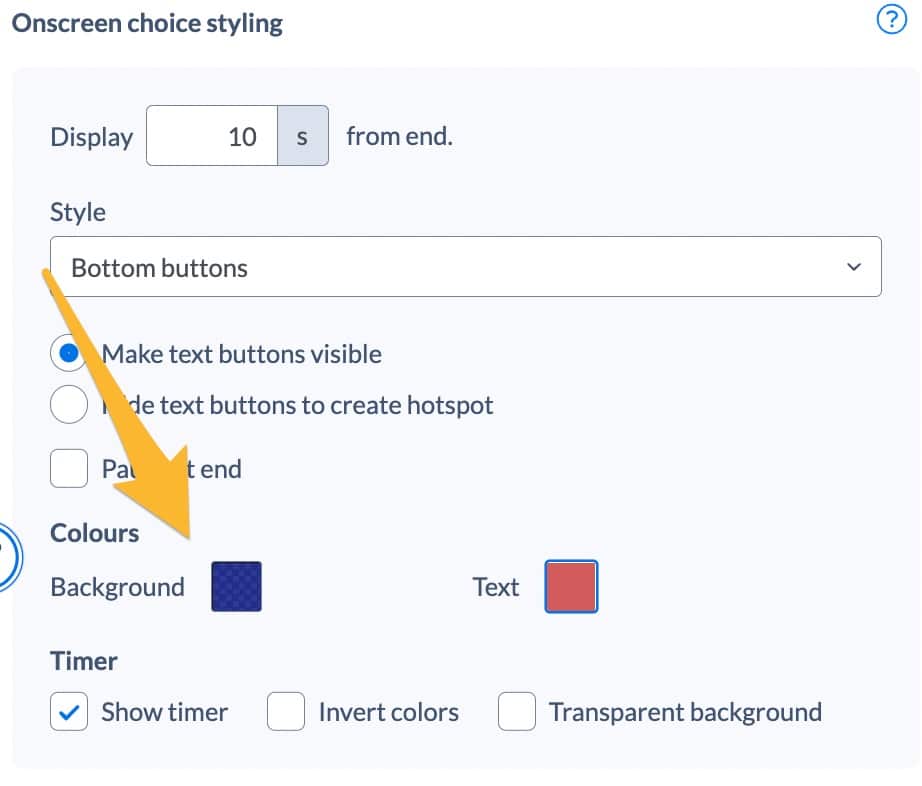
28 - Button color
Background Colour and Text Colour are initially set in the Project Default Settings Panel. These are the default settings for the entire project and get applied to every island including retrospectively to pre-existing islands.
If you want to override these default colours, you can override them in the each island’s settings panel.
Default Island Settings
Override Colour Settings
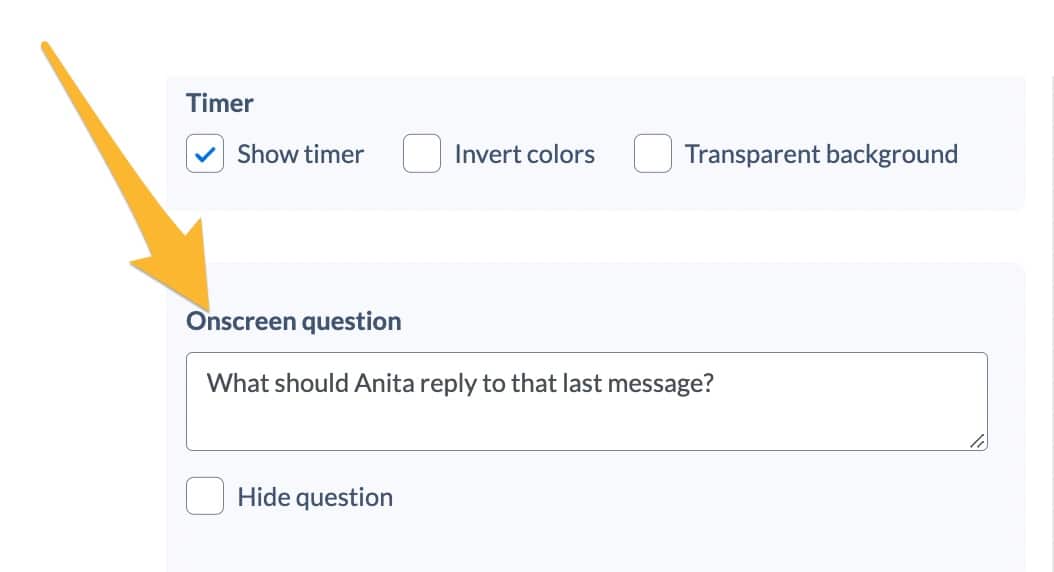
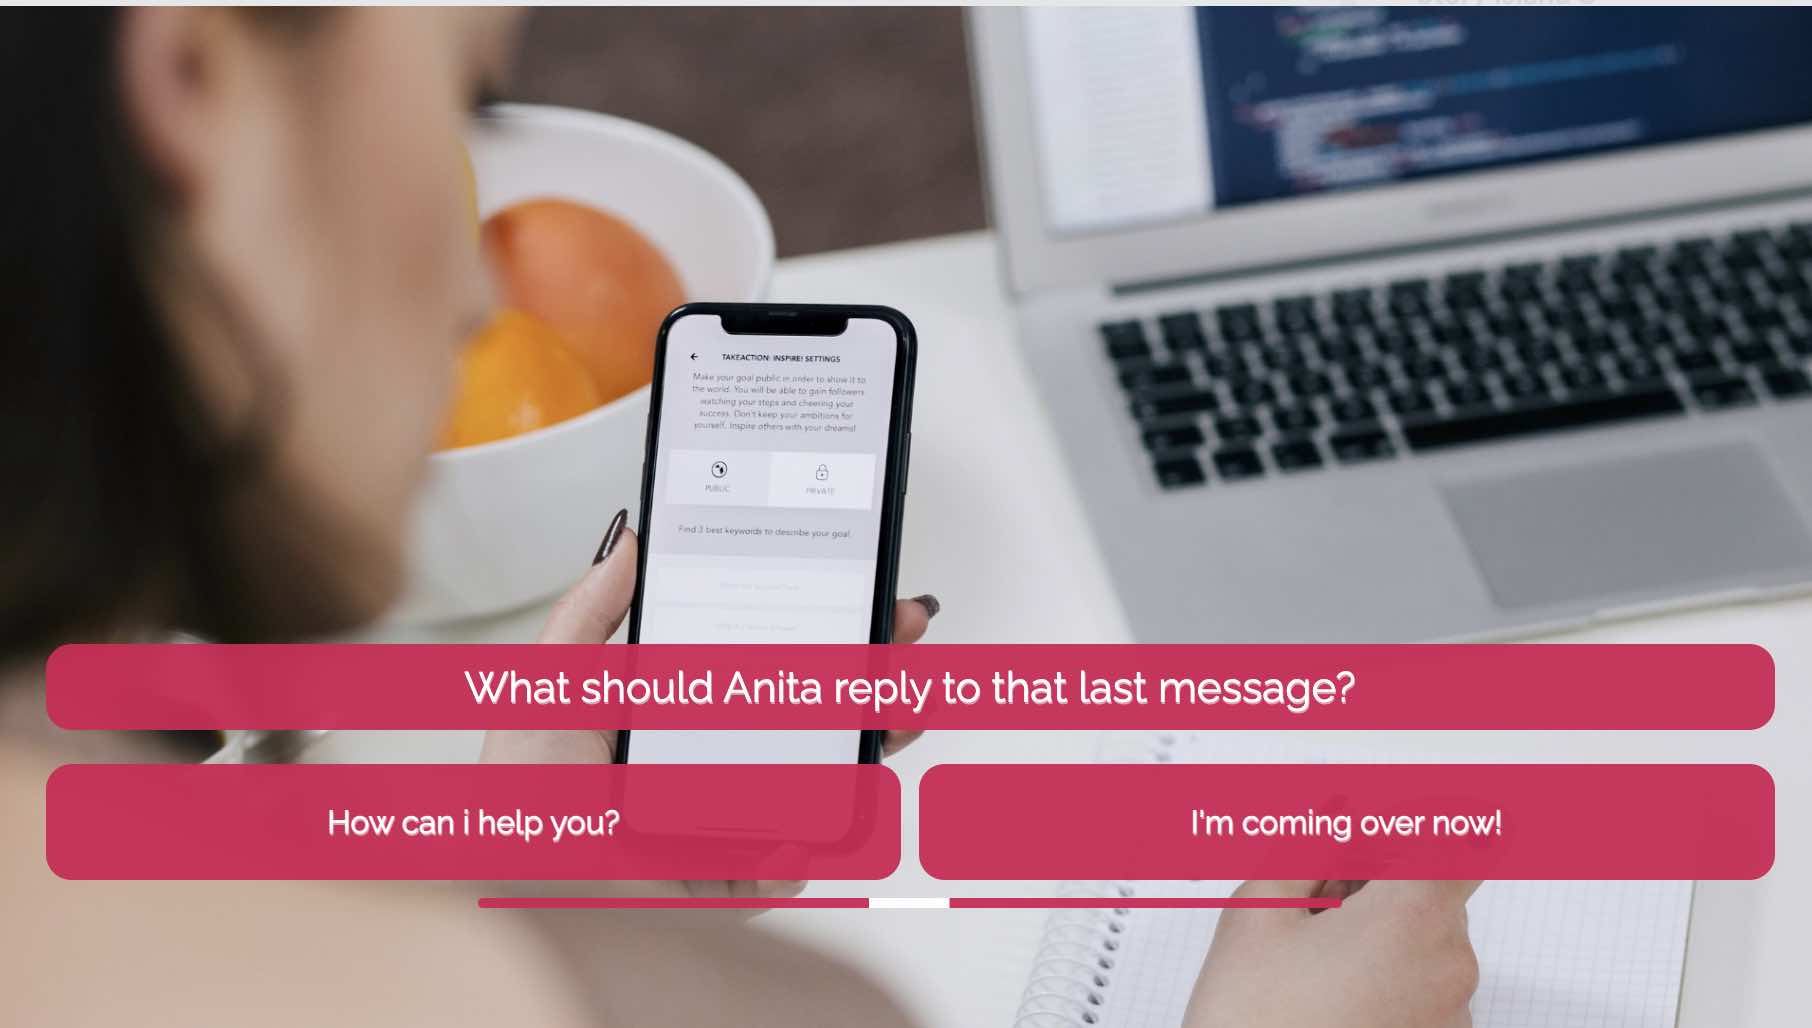
29 - Onscreen question
This field is often used by people when they are drafting projects, but it can also be used for learning by asking questions on the screen for viewers to answer.
On the player, this question will be displayed in a rounded box which inherits the button colors as set above.
Onscreen question settings
Example of onscreen question
30 - Hide question
When this checkbox is selected, the text that has been added to the ‘Onscreen question’ field will not be visible on the player.
Onscreen question settings
Example of onscreen question
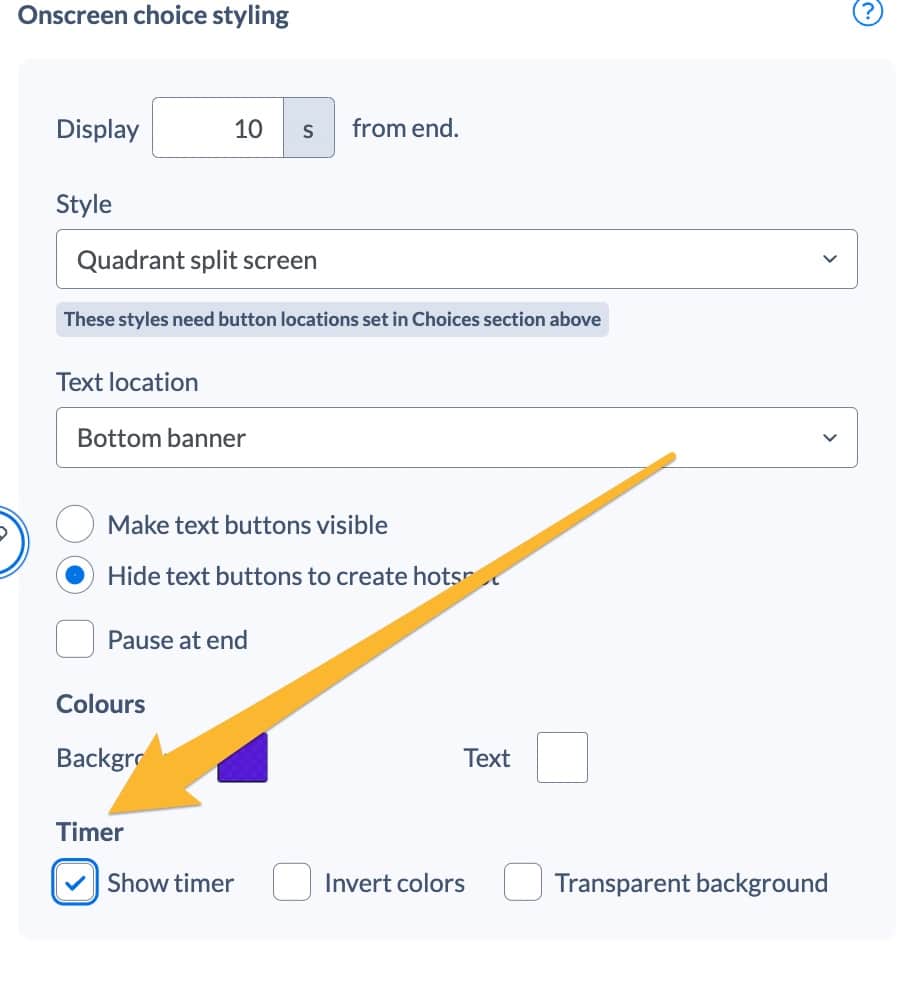
31 - Invisible hotspots
By default, the text is set to show on buttons. If you click “Hide text buttons to create hotspot”, the buttons (and text on them) will be invisible, but the area they would normally cover is clickable.
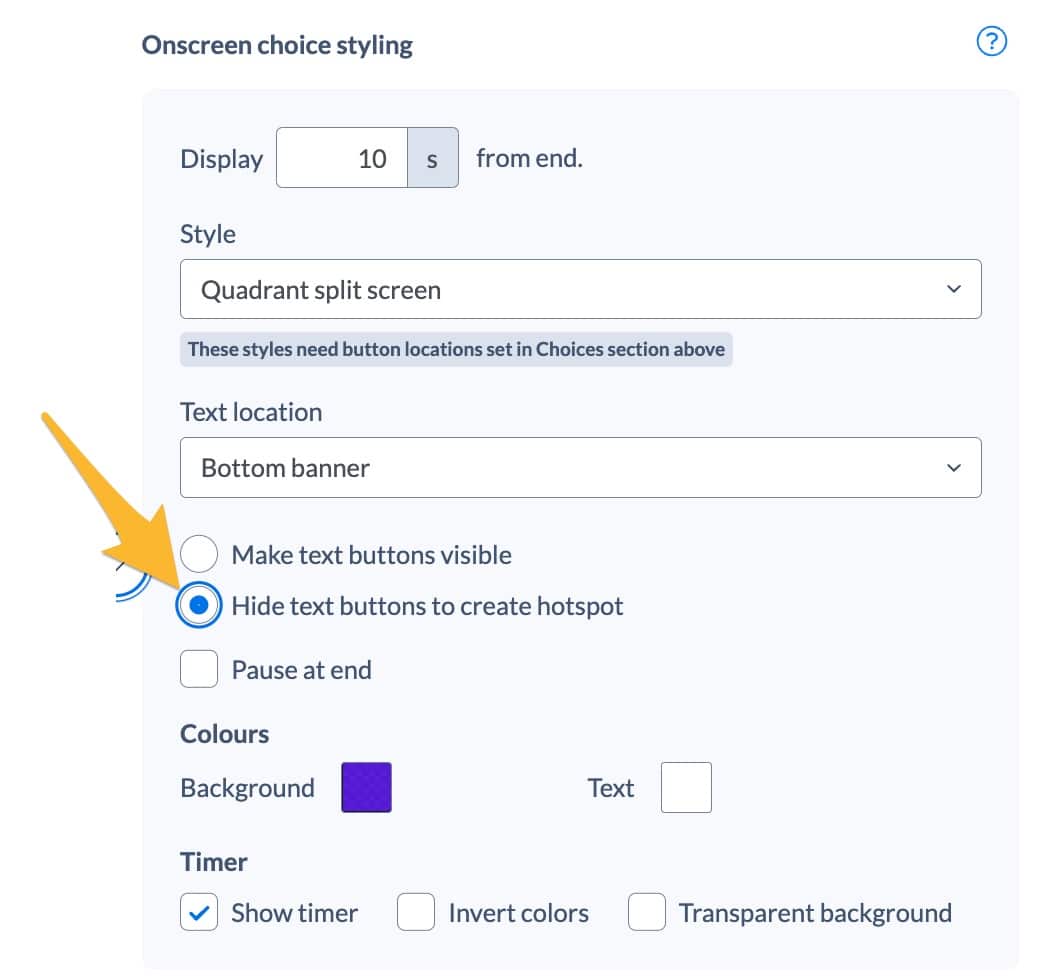
This is most often used is with Split Screens and Quadrants, to make clickable areas over the top of graphics in videos, but you can use hotspots with custom button positions to make any area of your video clickable.
Hide text buttons to create hotspot
Make text buttons visible
For full details on this – watch our invisible hotspots & split screen tutorial video or visit our help section: How do I create invisible clickable hotspots?
32 - Timer
These are the settings for the timer bar for your video on this island. Useful if you’re require viewers to quickly answer a question within a certain time.
You can choose to show/hide the timer bar.
The bar uses the background & text colour – there are settings for these to be inverted and to make the background transparent.
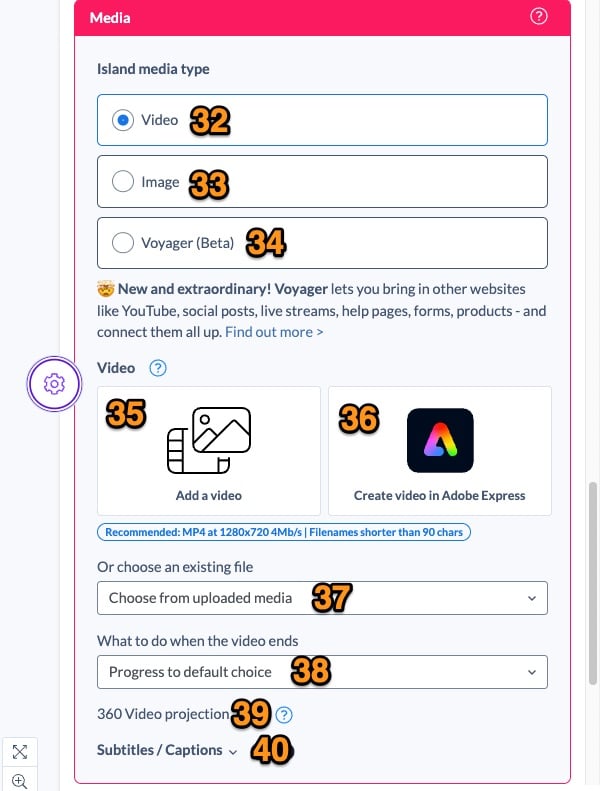
Media
Upload videos and images or use our Adobe Express integration to create media within Stornaway. Connect external webpages in your interactive video using Voyager for a seamless and engaging journey.
33 - Video
The majority of Stornaway creators use videos within their project and it is the media type that is selected by default
34 - Image
Some Stornaway creators use images effectively for their projects. When uploading images, there will be no timings so the show/hide buttons, timing controls and timer bar will not be used.
Our recommended settings for uploading images are:
- 1920 x 1080 pixels resolution recommended – but any size is possible within the player’s 16:9 rectangular frame. Resize using the Adobe image converter linked below.
- JPG at 8/12 or 75% quality recommended. We also accept PNGs but they are larger and take a bit longer to load.
35 - Voyager
Stornaway Voyager now lets you bring content from all over the web into your video – YouTube, social posts, live streams, polls, products and more and then connect them up into transformational user journeys viewed through the Stornaway ‘magic window’ that you can embed on your site.
Simply enter an embeddable URL in the field that is shown when ‘Voyager’ media type is selected. Buttons that you have set up will be displayed over the top of your embedded webpage, keeping viewers immersed in your project and allowing them to branch off elsewhere into the journey.
36 - Add Video/Image
This button allows you to upload a video or image that is stored on your device.
For a more detailed explanation of our recommended settings for uploading media, visit our help page here.
37 - Adobe Express integration
Use Adobe’s Express’ new editing tools within Stornaway’s interactive video web editor.
Click the button to open an Adobe Express modal inside the Stornaway app where you can craft exciting and creative media. You can work with media that your team have already made, or create new ones using the giant library of stock footage that Adobe Express has to offer. You can even utilise the AI-first features including ‘Generative Fill’ and ‘Text to Template’, plus more integrated creative workflows that are revolutionising creative expression for creators and brands.
When you’re happy, simply click ‘Save‘. You might need to give it a minute depending on the file size, but then you’ll be returned to Stornaway with your media attached to your island. It’s that easy!
38 - Choose an existing file
If you have a video file that is to be re-used across different islands within your project, this option will save you time and resources.
All MP4s that have been uploaded to your projects will appear in this dropdown, so you can select to reuse this file without having to re-upload it all over again.
39 - What to do when the video ends
If you have uploaded a video, these options will inform the player on what to do with the video finishes playing.
Selecting ‘Pause at End’ will stop the island at the end to wait for the user to make a decision – using a freeze frame on the last frame of the video file you upload.
If you’re using this to create a menu screen – and perhaps you want to include some moving video in this – another way to do this is to create a separate ‘menu screen‘ island, where the default choice is to loop back to the beginning of this menu screen island. Full details on this, visit our help section: How do I make the Stornaway.io player wait until a user makes a choice instead of automatically moving on?
The alternative to Pause At End is Progress Mode – see notes on “Cut on Click” above.
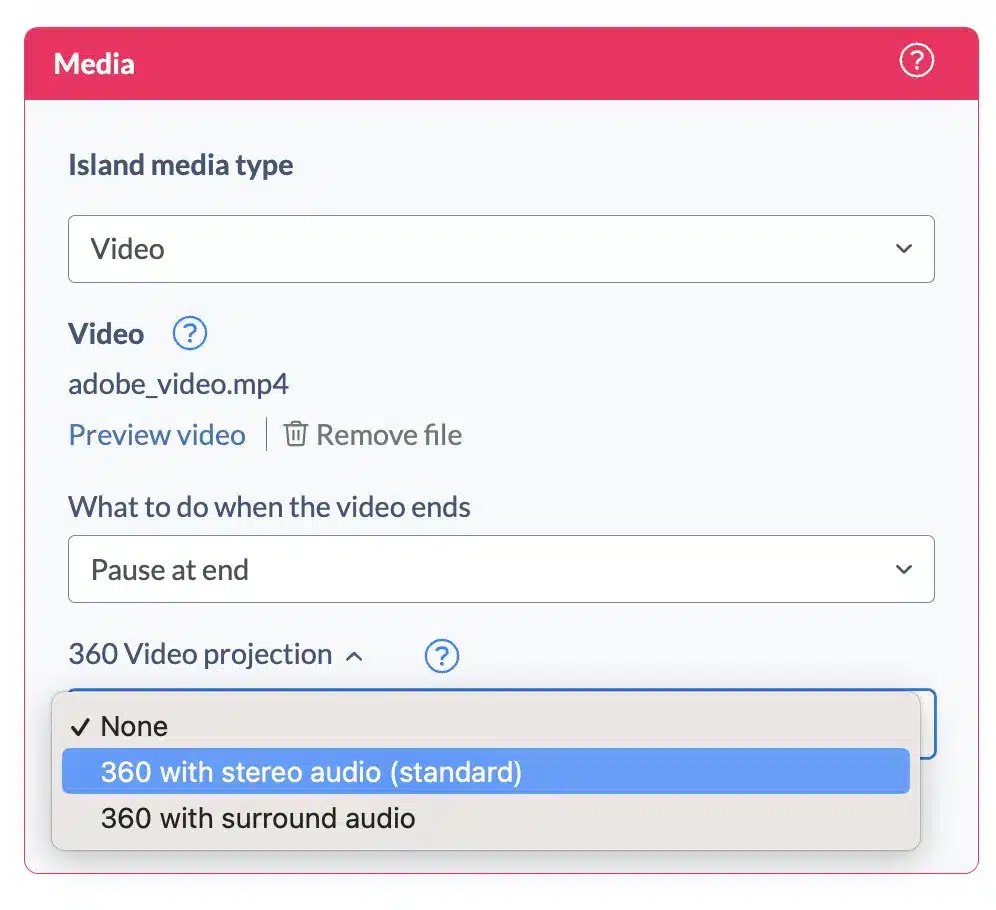
40 - 360 Video projection
Stornaway allows you to create interactive journeys and experiences from 360 degree video footage to truly immerse audiences for virtual tours, real-life training scenarios and immersive events.
By default, the ‘360 video projection’ will be set to ‘None’, but if you are using 360 footage, you can select the audio type for your video (standard or binaural).
Once you’ve selected an option and saved your island, the 360 video projection will be enabled on that island.
41 - Subtitles/Captions
Make your videos accessible and engaging with subtitles and captions.
Head into this section of your island settings panel where you can select the language and upload the relevant
Currently, Stornaway supports .VTT files for subtitles and closed captions.
Other Settings
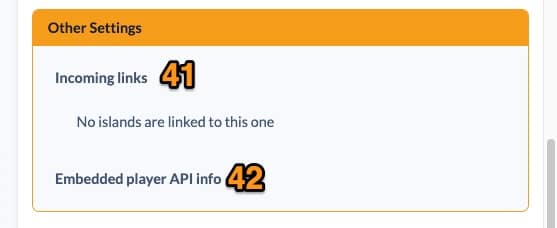
42 - Incoming Links
This table gives you a snapshot of incoming links from other islands so you can keep on top of exactly where this island is linked to from elsewhere in your journey.
Remove this link by simply unticking the checkbox next to the incoming link.
Island & Choice Settings FAQs
How do I make a button that links to a web page or product?
Choose External URL from the “Links To” pulldown menu in the sidebar (see picture below).
Add a link and tick the box to say whether you want the link to open in another tab. If you are embedding the video, choose this.
You can use any kind of URL to a web page, PDF document, social media account, etc.
For instance, you can just link to a regular web page like https://www.stornaway.io/examples
Other examples of URLs you could link to:
- Social media platforms allow you to create a URL with the message pre-written (e.g. this link – see more details in the “How do I share to social media” question, below).
- Use mailto: before an email address (eg mailto:hello@stornaway.io) to make it open a new email to that address.
- Some e-commerce platforms (like Shopify) allow you to specify a product with an Add To Cart command in the URL. Some need you to set this up.

How do I change the play button color and remove the Stornaway logo?
In your project settings via Settings > Edit Project, Premium users can see settings which let them change the colour of the player controls and remove the logo at the bottom right of the player controls. See picture below.
To upgrade your plan, click the Top right menu > Subscription > Change Plans, or contact us.
NB this is the logo at bottom right, not the Watermark logo at top left of the video – that is only shown for Trial and Free users, and disappears when you subscribe.

How do I create invisible clickable hotspots?
This also lets you create clickable areas, people or objects in your video – like the dog with the bone in the demo video on our home page.
Another example would be using a split screen hotspot to make each of these three people clickable. Or see the example of animated buttons at the bottom of the page.

How to make clickable video hotspots
Most people arrange their buttons left-to-right on screen. For this, we recommend you use the Left-right Split style with Central Text and Area Overlay.

If you have any questions or suggestions about this, please let us know at support@stornaway.io
How do I start playing from any island, not just the start?
Yes! Play from here is your friend. You can find it near the top of the Sidebar for every island and tab, just under Name and Description.
When you have published your story, there’s a Public URL for every island – you can find it just next to ‘Play from here’ in the sidebar. This is a link to that specific island, so you can provide links that let viewers jump straight to an island.
This lets you share an individual island on social media, or make a list of links on a web page or create a playable visual map of your story (see our example here)

How do I make the Stornaway.io player wait until a user makes a choice instead of automatically moving on?
Choose ‘Pause at end‘ in the styling section in the sidebar (see picture).
This will freeze frame on the last frame of the video file you upload, and wait for the user to make a choice.
Another way to do this is to create a separate ‘menu screen‘ with a still or moving image:
- To make a still image menu, create a separate island for the menu, and upload a still image as the island’s Poster Image.
- To make a moving image menu, create a separate island for the menu, and upload a video to it. Then make one of the island’s choices to loop back to the start of the same island itself, set it as default, and hide that choice by ticking “Hide” next to its onscreen text field. The island will then loop until someone makes one of the other choices.

How does the Either/Or game logic work for alternative paths?
Then at the end, you can add an either/or condition to a button, which says:
If the viewer has watched: B1 (Bad choice – take the knife)
then Link to Y1 (Good ending – movie marathon)


How do I make a button that shares a message to social media?
Choose External URL from the “Links To” pulldown menu in the sidebar (see picture below).
Enter a link using one of the pre-written message formats listed below for Twitter, Facebook or LinkedIn.
Tick the box to say whether you want the link to open in another tab (If you are embedding your project, set it to open in a new tab).
To create a pre-written Tweet with a custom message, use the format:
http://twitter.com/share?text=your+words+separated+by+plus&url=yoururlhere&hashtags=yourhashtag
For example this link creates a Twitter post that says, “Get started with the amazing Stornaway” and includes a link to the video with #interactivefilm as a hashtag.
(There should be no line break in the link, even if the browser is showing you one here)
Facebook and LinkedIn no longer allow the pre-writing of custom messages the way Twitter does.
To create a pre-written Facebook post, use the format:
https://www.facebook.com/sharer/sharer.php?u=yoururlhere
For example, this link creates a Facebook post that autofills the image and link to your story.
To create a pre-written LinkedIn post, use the format:
https://www.linkedin.com/sharing/share-offsite/?url=yoururlhere
For example, this link creates a LinkedIn post that autofills the video player.

How do I make interactive 360º videos in Stornaway?
Stornaway.io creators can now add 360º videos to their stories and link them up using on screen links to create interactive experiences that are even more immersive.
Your story can be entirely 360, or a mix of different media. Each Story Island is its own unique section. You can link from 360º to regular 16:9 video and stills in different story islands, and it will all flow on seamlessly. They all show with the Stornaway links you know and love.